Showing posts with label vegetarian. Show all posts
Tuesday, April 29, 2014

80% Pizza

And now for something that's the complete opposite of dairy- and gluten-free... here's a guest post from my husband, Kevin! For as long as I've known him, he's been striving to make amazing pizzas at home. Luckily, it's surprisingly easy to make a darned good pizza at home without any pizza-specific equipment, and with just a few easily-obtained ingredients. Following this method, even I was able to make a pizza that was far and away better than the vast majority of our local take-out joints  - so if I can do it, you can too. 

Take it away, Kev!

Pizza!

Great pizza is great, and bad pizza is, well...it's still pretty darn good! Sounds like a good candidate to make at home, doesn't it?

Hi there. I'm Kevin. I like to think that Val's the gourmet, and I'm the slacker. So why am I here? Well -- I'm no chef, but when it comes to pizza, I've got some strong opinions.

Here's one - making pizza at home is: cheap, tasty, easy. Choose three. No, really. You don't have to compromise.

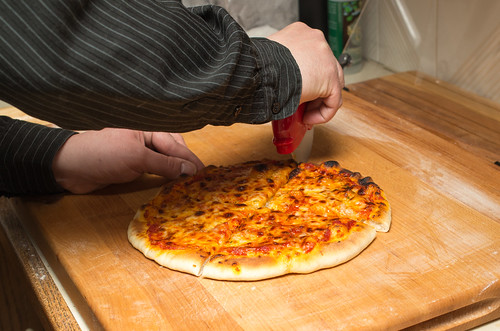
Cutting the pizza

Well, I should qualify that. Do you care about making 18" pies so you can get NY-size slices? Do you require your pizza to be wood-fired in a 1000 degree oven? Have you invested in a Hobart floor-standing mixer because your KitchenAid couldn't develop gluten effectively enough in big dough batches? No? Then don't worry about it. You are going to love the 80% pie.

This is the product of another opinion of mine - that in the food world, pizza is the purest embodiment of unattainable perfection. No matter how hard you work at it, it's always, always possible to make a better pizza. (Sure, plenty about pizza is subjective, but stick with me here ok?) So think about a pizza that is 99% as good as can possibly be made. We're talking the stuff of legend. The stuff you have to drive across state lines to find...or maybe even hop on a plane. This is the stuff you get from pizzaioli who have devoted their lives to it. That's the level of commitment required. That's a 99% pie.

An 80% pie, on the other hand, requires you to read a blog post written by a dork, buy three ingredients, and spend 30 minutes in the kitchen. You'll get it on the first try.

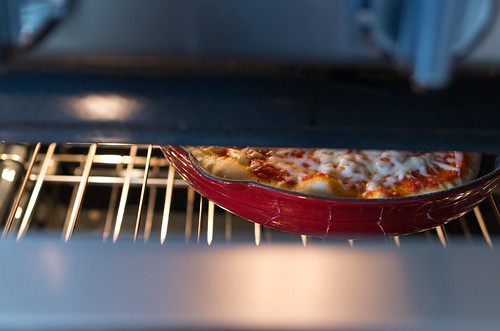
In the oven

Don't believe me? I've formed these opinions based on over a decade of trial and error (and error and error). And then I threw out most of what I came up with because I read stuff by folks like Kenji over at Serious Eats. It blew my mind.

The methodology in this post is adapted from one of Kenji's methods. Really, he did all the hard work. All I'm going to do is recommend where to cut corners. The beauty of this method is that it yields great, consistent results -- and it does it without special equipment.

Hardware

You just need a broiler and a 12" oven-safe skillet. Cast iron, enameled cast iron, or steel are all great. Just don't use non-stick whatever you do, it can't take the heat!

A bench scraper and pizza cutter are also handy, though not required.

Ingredients

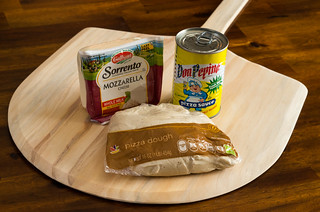
Ingredients


Pizza is a blank slate. Topping combinations are limitless. That's a worthwhile rabbit hole to go down, but it's one for another day. First, we need to cover fundamentals. Let's make the slate tasty!
  • 1 can Don Pepino pizza sauce
  • 1 lb Sorrento whole milk dry mozzarella block
  • 1 lb Stop and Shop pizza dough (typically found near the deli, don't get the one from the bakery)
Note: this will yield two 10" pizzas, with leftover sauce and cheese.

That's it. Only other thing you need is a little flour and some olive oil.

Do the ingredients matter? Yes. I chose these specific brands because I've gotten the best results from them out of all widely-available options I've tried. Jump down to the appendix if you want explanations and alternatives.


Dough Prep

Take your dough out of the fridge and let it warm up to around room temp on the counter. You might need to do this 15 to 30 minutes before starting. Don't skip this step -- it's important because it makes the dough easier to shape and helps to get a good rise out of it. Once it warms up, let's jump in.

I don't know about you, but dough intimidates me. The darn stuff just seems to have a mind of its own. Well, let's show it who's boss. First things first: we're making 10" pizzas, and a pound of dough is perfect for two of 'em, so we'll subdivide it. After that it will have some time to rest and proof (warm up and rise even more) while we prep other ingredients.

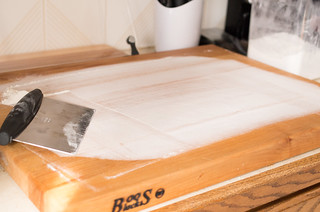
Grab some AP or bread flour and prep a work surface. A bench scraper is great for this.

Floured board

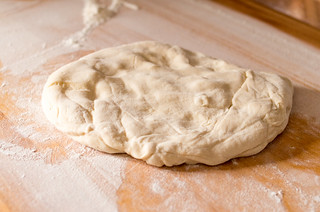
Pretty much all packaged dough is sticky stuff. Put some flour on your hands and turn the plastic packaging inside-out. Let gravity help you peel the dough off the plastic, and onto your floured surface.

Dough

Get a little flour on every sticky surface of the dough. This makes it easier to work with.

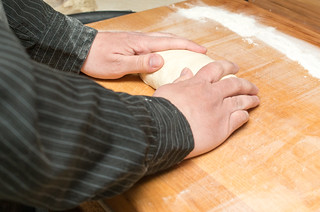
Working the dough

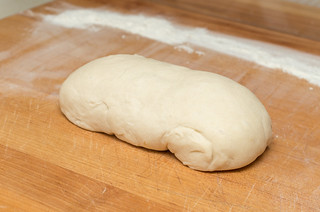
Shape it into a little loaf. Don't knead it (fold it over itself), just press and form it.

Dough log

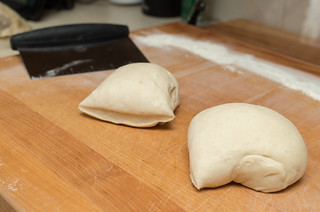
Now it's easy to divide it into two equal pieces. Again, a bench scraper is great for this, or use a knife. It doesn't have to be perfect. Eyeball it!

Note: If you didn't divide it as evenly as you'd like, just go with it. Don't try to rip little pieces off one and stick it to the other one. The dough is typically too far developed to do that successfully, and hilarity will ensue if you attempt it.

Split dough

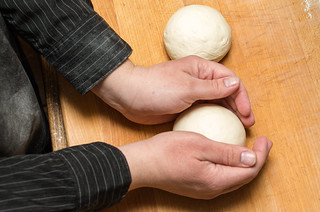
Take a dough in your hand with the cut side down. Shape it into a ball by pushing it into itself from the bottom-up, like it's a little jellyfish. Repeat with the second one.

Dough ball

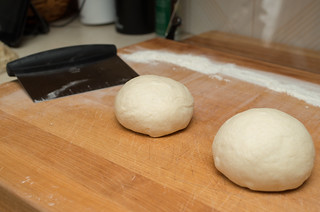
Put the dough on your work surface, seam side down. Keep it touching the surface and rotate it a few turns between your hands. This makes the dough taut and smooth.

Dough ball

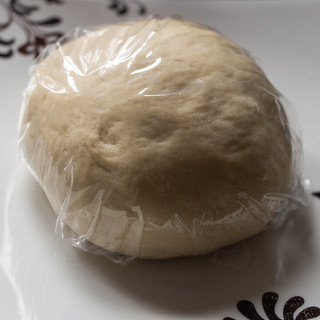
Good to go! Cover these in a little plastic wrap and let them sit and proof.

Proofing the dough


Note 1: Hey if this was confusing, refer to someone far more skilled than I at teaching -- the great Mr. Alton Brown. He has an excellent video demo of dough handling in his first pizza episode of Good Eats: Flat is Beautiful.

Note 2: If you want to save one of these for later, seal it up in a zip-top plastic bag (quart or larger), with as much plastic touching the dough as possible. This prevents it from forming a skin.

Mise En Place

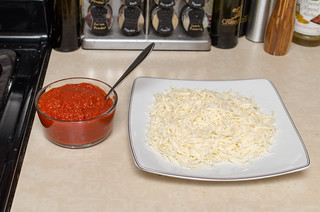
Sauce and cheese

Pop open your sauce can and get a large spoon at the ready, then shred some cheese. Each 10" pizza only needs a few ounces, so you don't have to shred that whole huge block. Unless you wanna.

Remember, you are the Royal Taster. Always be sure to taste your cheese to ensure it's safe for general consumption. Might want to repeat that a few times to be especially safe.

Pre-heat

Ready to go? We're going to use the broiler.

Arrange your rack so you can just barely fit your skillet on there under the broiler. I haven't tried this with a bottom-drawer broiler, but I expect that it would work fine. Turn the broiler on as high as it goes and let it pre-heat.

Form the Dough

Now for the fun part! Let's shape that dough ball into a disc. Are you ready to toss that sucker in the air?

Make-a-da-pizza (Project 365: 80/365)

Just kidding. Yup, it's really fun to toss it like this, but frankly it doesn't work great with the small 10" pizzas we're making today, and it's a bit error-prone. Also, don't do this in a kitchen with a ceiling fan going.

Nope, this article is about consistent and easy results. Know how we get that? A rolling pin.

Pizza nuts typically scoff at the thought, and yup, it's true that you won't reach perfection this way -- but you will get an awesome pie, and you'll do it on your first try. Hand-stretching takes hours of practice. After years of doing it I still tear the center of my dough sometimes.


Maybe I just suck. But no matter! With a rolling pin, it's smooth sailing.

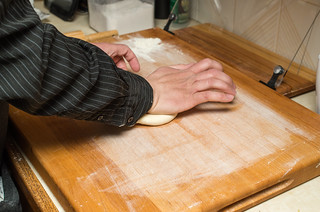
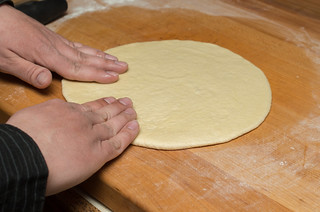
First, lightly re-flour your surface and drop a dough ball on it. Use the palm of your hand to flatten the ball into a disc.

Forming the dough

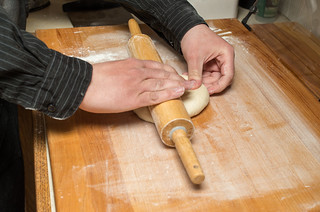
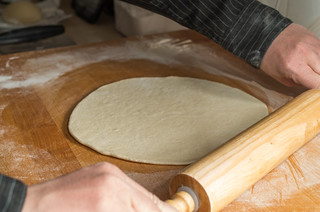
Now start rolling. It'll take a bit of time and patience. Don't rush, you'll get the hang of it.

Forming the dough

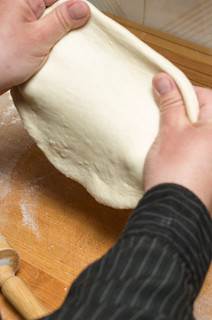
Stretch it gently with your hands a bit as you go, then roll some more.

Stretching the dough

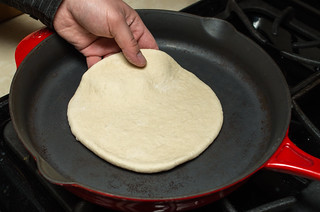
As you progress, put it in the 12" skillet as a point of reference. We're aiming for a 10" dough -- actually, just a little bigger.

Sizing the dough

If it takes an eternity your dough might just need to warm up a bit more. You can always cover it in plastic and come back after 5 or 10 minutes and try some more. Temperature makes a huge difference in how much your dough cooperates.

Rolling the dough

This method won't give you much of a crust, but it will give you the uniform thickness you need.

Sizing the dough

There we go. That's the size you want, a little smaller than the skillet. Return your dough to the work surface.


Top and Cook

Here we go, the point of no return.

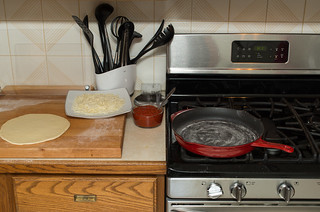
You're going to pre-heat the skillet on the stove top, put the dough in it, top it, then put it in the oven.

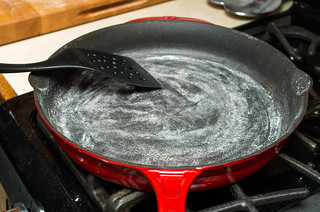
First, dust the skillet with some flour, and shake off excess. Spread it evenly.

Flouring the pan

Preheat the skillet under high heat. Our aim is to get it to the point just before it starts smoking.

Meanwhile, on your work surface, drizzle some quality olive oil on your dough and rub to coat. Blot off any excess. Note that this will shrink your dough slightly. That's OK.

Oiling the dough

Look sharp, keep an eye on that pan as it heats. It should take around three minutes. Now's the time to have your sauce and cheese at the ready.

Ready to go

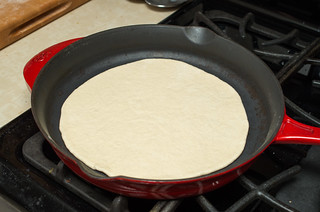
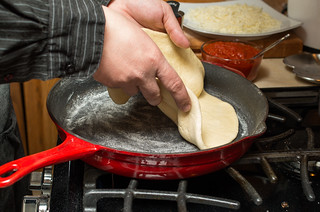
Once you smell the flour start to get fragrant, before it starts smoking. it's time to add the dough to the pan. Safety is more important than perfection here, don't burn yourself! I like to lay one edge of the dough near the edge of the pan, then lay the rest down.

Placing the dough

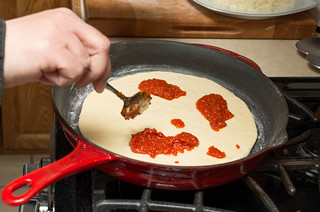
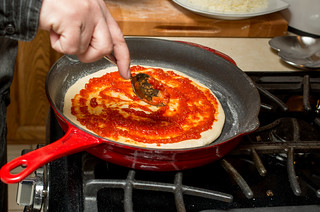
If your dough ended-up bunched or something in the pan, use a spatula to adjust it. Don't worry if it's a bit oblong -- we need to keep moving now. Spoon on some sauce.

Saucing

Spread the sauce with your spoon and get good coverage, but don't drown the thing.

Saucing

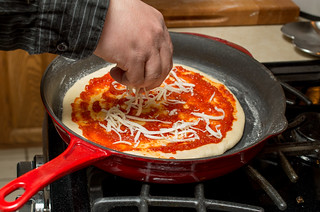
Cheese it!

Adding cheese

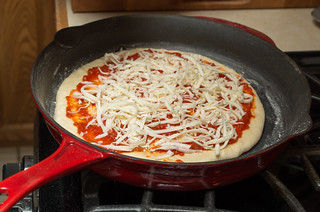
You may be tempted to bury it in a sea of white. Resist this urge. The best pizza has balance.

Ready to bake

Feel free to sprinkle with a bit of kosher salt if you want to kick things up a bit. Also some dried oregano or parsley is nice to add some color.

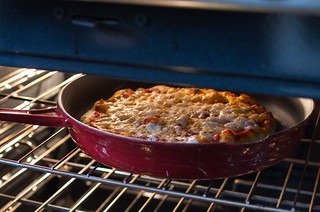
Turn your stove-top burner off, then under the broiler it goes!

In the oven

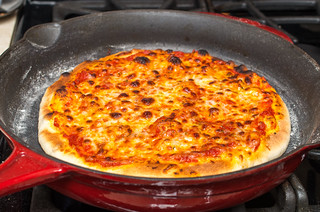
Now to get this baby golden and delicious. Look for your cheese and dough to brown up. It'll take anywhere from 1.5 to 4 minutes, depending on your broiler. You may need to rotate your pan halfway through to get even browning. Watch it, then pull it when it looks maximally awesome.

Almost done

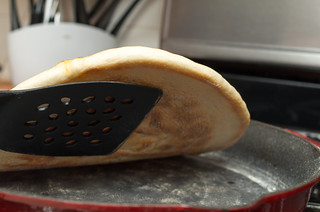
The top is done, but the bottom isn't yet. Put it back on a burner and turn it up to high.

Crust check

Almost.

Crust check

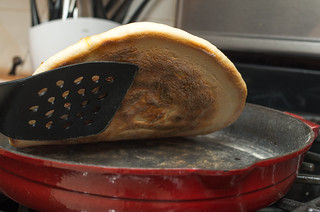
Almost!

Browned crust!

There we are.

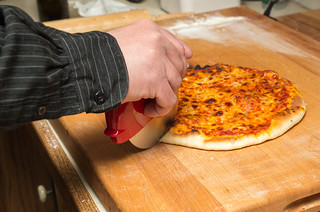
Well done! Kill the heat, and use a spatula to carefully transfer the pizza to a cutting board. Let it sit for a minute, then if you have a pizza cutter go to town. Else any cutting implement can be used. My grandma was all about kitchen shears.


Cutting the pizza

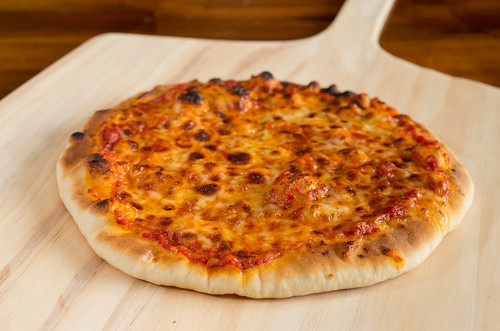
Here, my first attempt had crust that was a bit dense. That's because I didn't let the dough warm up and proof long enough. No matter, it was still delicious!

Cornicione

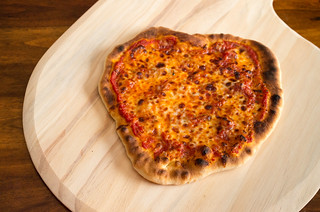
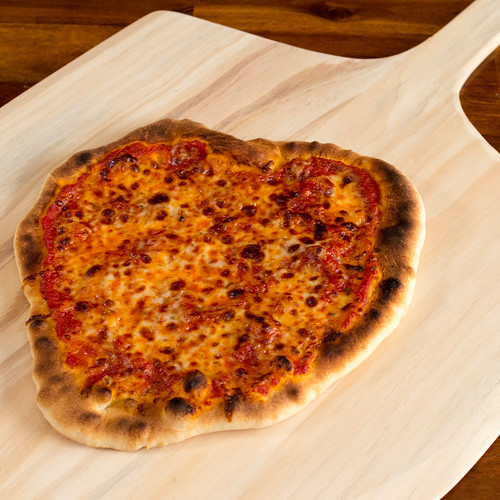
Making a second one? Dive right back in. Here, Val did our second attempt. The dough was much warmer, which made it tougher to keep round. It also yielded a better crust, though! (The blobby heart shape was... totally intentional. *shifty eyes* - Val)

Blobby pizza

Nom!

Dig in!!

I <3 pizza (Project 365: 60/365)


APPENDIX

When it comes to slacker pizza making like this, I found the hardest part to be picking which ingredients to source. Here's what works best for me, and some alternatives for convenience.


Sauce

This is a matter of personal opinion, but I strongly recommend you pick up:
  • Don Pepino pizza sauce
    • Fresh, uncooked, delicious sauce, light on herbs.
    • Lots of super markets have it -- I've seen it in at Hannaford's, Price Chopper, and Wegmans. My Stop and Shop doesn't have it unfortunately, but yours may. I can't remember if Whole Foods has it.
There's a really big difference between starting with an uncooked vs. cooked pizza sauce. It's certainly a matter of opinion, but I've found that I strongly prefer uncooked.

There are a million brands you could use...why Don Pepino? First, because it doesn't have calcium chloride. Most brands add this to keep tomatoes from becoming mushy, and in my experience it affects flavor big time. Lots of forums discuss this issue. Second, because the quality is excellent. It tastes like fresh garden tomato, year-round. I have no idea how they do it.

Alternative cooked sauce:
  • Stop and Shop Nature's Promise Organic pizza sauce
    • Surprisingly tasty, heavy on herbs.
    • Better than all of the other pre-made cooked stuff in my book (but not as good as Don Pepino).
I feel like cooked sauce doesn't have enough bright, acidic bite to properly stand up to fatty cheese.


Cheese

I'm lazy, but there's one bit of manual labor I don't skip for pizzas: shred your own cheese! Why? Because pre-shredded has anti-clumping agents added. That means it doesn't melt and gooify as effectively.

We'll talk dry mozzarella today. Go full fat whole milk. If you want less calories, use less cheese.
  • Polly-O
    • Having visions of 7th-grade lunch? We're not talking string cheese here. Polly-O whole milk dry mozz blocks are actually world-class stuff. A lot of big name pizzerias swear by it.
    • A little hard to find. I can only get it at Price Chopper at the moment.
  • Sorrento
    • Ubiquitous and excellent stuff.
  • Trader Joe's
    • Also excellent. A little on the saltier side.
If you must use pre-shredded, that's OK. I won't tell.


Dough

The tastiest dough is one you make yourself, but most good ones require an overnight cold ferment. And all of 'em require you to make a mess in your kitchen. This goes against the spirit of this particular pizza post.

Instead, let's buy one. Pick a dough that's cold but completely thawed. We don't want to wait so avoid frozen, and also avoid dough that's so puffed-up it looks like it's about to burst out of the bag.

Options that tend to be consistently good:
  • Whole Foods
    • This is my favorite store-bought dough. It has a great flavor and is easy to work.
    • So why didn't I make it my default recommendation? Because the Stop and Shop stuff is much more ubiquitous.
  • Stop and Shop
    • S&S makes a decent dough. Not the best color and rise, but good flavor.
    • If your Stop and Shop is anything like mine they actually sell three or four different doughs. I use the Stop and Shop branded one that is not from the bakery. The bakery stuff is made on-site, and it's inconsistent. The non-bakery one (usually found near the deli) is made off-site and is completely consistent, no matter which store you buy it at.
    • Heads-up: they store this stuff in freezers in the back, and sometimes all you can find for sale is rock-hard. Avoid those (unless you need a spare sportsball).
  • Bertucci's
    • Just walk up to the take-out counter and ask to buy some dough. You might feel a little weird doing it, but they were always happy to sell me some. They sell large (about 1.3 lb I believe) and small (maybe 3/4 lb?).
    • It ain't cheap, but sometimes they offer you delicious free rolls to go with it! :)
You can certainly ignore these suggestions and try any other dough you like, but be warned -- dough sampling can be frustrating. I often ran into options that weren't tasty, weren't fully-developed (so they would tear), or otherwise caused problems.

If you're new to pizza, try to start with one of these options. Then go nuts and branch out to other stuff!
Tuesday, February 18, 2014

Side Dish: Roasted Frozen Vegetables

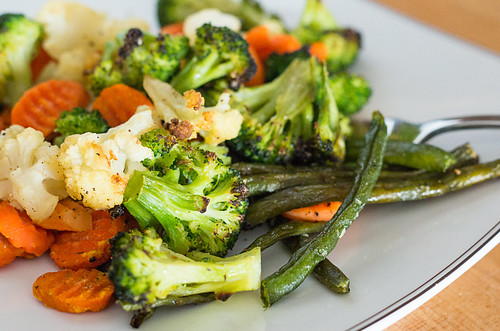
Roasted frozen veggies

When you were a kid, and your mom needed to add a last-minute veggie side dish to dinner, chances are she did one of two things: (a) opened up a can of veggies and boiled them, or (b) opened up some frozen veggies and boiled them. Like most other kids, you probably staged a coup at the dinner table, which most likely ended in tears and/or an empty stomach.

Then... you became an adult and realized that Mom was just trying to keep your meals balanced as best she could with a busy schedule. Soon, you found yourself in a similar place - eating dinner at home is healthier and much easier on the wallet, but some nights you're too tired to cook a meal from scratch (even a Slacker Gourmet meal), or you just don't have the right ingredients on hand.

In our house, when we have one of those nights, our go-to meal is either chicken sausage or bratwurst, and some kind of frozen seasoned veggie blend. However, since the hubby has some food sensitivities, that narrows the field to about 2 - 3 types of seasoned veggie blends, and we get tired of them pretty quickly. Plus, they've still got a bit more salt and not-entirely-wholesome ingredients than we'd like. So what's a Slacker Gourmet supposed to do?

Canned vegetables? NOPE. They're generally loaded up with salt (yes, I know they make no-salt-added varieties), and the texture, even before you cook them, is not quite right. They have a strange, mushy texture and slightly tinny taste. No thank you.

Plain frozen vegetables, on the other hand, have the potential to be a blank canvas in the right application. They're completely unseasoned, they're already cut up, it doesn't matter if they're in-season or not, and they've already been blanched before they are frozen (meaning they are partially cooked even before you get your hands on them). However, the cooking directions on the bags always suggest either steaming them in the microwave, or (gulp) boiling them. Can we treat them better?

One of my favorite ways to cook fresh vegetables is to roast them. Roasting at a high heat caramelizes the edges, brings out sweetness and nutty flavors, and tames the bitter edge on many vegetables. Of course, this works best on larger, harder veggies like brussels sprouts, potatoes, cauliflower, etc. - not so well on corn (off the cob) or peas, for example.

I got to thinking - can we roast frozen vegetables straight from the freezer? The answer: YES! The final texture is slightly different from roasted fresh vegetables, and the cooking time (which is almost completely inactive) is about 40 minutes, but there is barely any prep involved. Most importantly, the flavor of these humble frozen vegetables goes from boiling's "blech!" to "hey, these are pretty good!" They'll never be nearly as amazing as roasted fresh veggies, but they're a good trick to have up your sleeve.
I tried roasting frozen cauliflower, Brussels sprouts, crinkle-cut carrots, broccoli and green beans. The Brussels sprouts were the biggest disappointment - they're my absolute favorite roasted fresh vegetable, but their frozen counterparts just didn't have a fantastic flavor. I suspect that they are more sensitive to the blanching and freezing process than other vegetables. The carrots didn't really brown up; they seemed to get a little dry on the outside instead. The flavor really concentrated and got nice and sweet, though. The cauliflower and broccoli were tasty, but the surprise favorite of the bunch were the green beans! They started getting crispy in places and almost tasted like green bean chips. Yum!

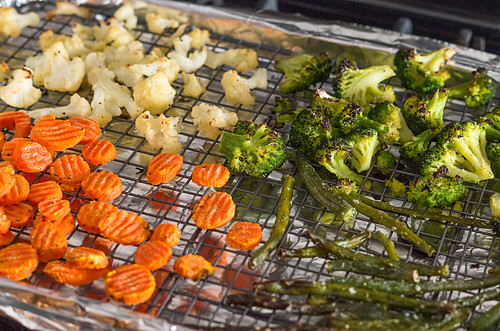
Frozen veggies after roasting

Roasted Frozen Vegetables
Serves 4-6 (or whatever the bag says)

Ingredients
  • 1 lb bag frozen vegetables - cauliflower, broccoli, carrots, etc. (please use bagged veggies and not frozen-in-a-brick veggies!)
  • a couple of glugs of olive oil (approximately 2 Tbsp)
  • salt and pepper to taste

Directions
Preheat oven to 400°F. Line a cookie sheet with aluminum foil for easy cleanup, and put a cooling rack on top of the cookie sheet. I used a cooling rack as the cooking surface to allow air to circulate all around the veggies so any additional water would drain off, and I didn't have to toss them at all during cooking. If you don't have a cooling rack, you'll probably want to stir the veggies a couple of times during cooking. 

Toss the still-frozen veggies with olive oil, and season generously with salt and pepper. Spread the veggies on the cooling rack, and roast for 10 minutes. 

Boost the oven temperature to 450°F, and roast veggies for another 30 minutes, or until they are nice and browned around the edges. Enjoy!

Print this recipe!


I personally like my roasted veggies seasoned simply with salt and pepper, but feel free to experiment with different oils and seasonings! A sprinkle of parmesan or Cabot Cheddar Shake at the end would also be great.

And if after all this, you try roasting canned vegetables, I really don't want to hear about it. Ew.

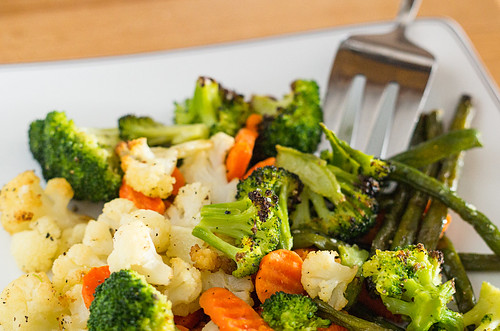
Roasted frozen veggies
Saturday, June 23, 2012

Food Processor/Stick Blender: Easy Olive Tapenade

Have you ever found yourself in one of these all-to-familiar situations?
  • Eating a piece of plain grilled chicken or fish and wishing you could jazz it up?
  • Making a sandwich and discovering that you're out of mayo and mustard?
  • Putting out crackers or sliced baguettes for company, but missing just one more spread for them?
Well, there are certainly many solutions for each situation. But what if I told you there was one recipe that could fix all of those problems, and more, in one fell swoop?

Enter olive tapenade. From Wikipedia:
Tapenade is a Provençal dish consisting of puréed or finely chopped olives, capers, anchovies and olive oil. Its name comes from the Provençal word for capers, tapenas.
Well, doesn't that sound fancy! However, your Slacker Gourmet alarm bells are probably going off. Finely chopped? Capers? ANCHOVIES? Breathe, people! Let's break this down:
  • You don't have to chop anything up into itty bitty pieces, as long as you have a food processor or stick blender. Traditionally some tapenades were made with a mortar and pestle - we're definitely not going down that road either. 
  • Yes, capers are one of those items you've typically bought for one recipe and one recipe only. They usually come in expensive little jars, of which you use 7/8ths for the aforementioned recipe. But - if you find yourself at Trader Joe's or an Italian grocery (not just a specialty shop), they sell capers in larger jars, and if you keep 'em in the fridge in their brine, they last for quite awhile. If you have them around on a regular basis, you'll find yourself using them in pasta/grain salads, stews, chicken sautés, or anything that needs a briny kick. However, if you still don't want to buy them, they are NOT essential to my quick tapenade recipe (which I suppose would technically make it an olive relish instead, but whatever). 
  • Anchovies? So not necessary. If you happen to have them around, sure, go ahead and throw a fillet in, but there's no reason to go out and buy them. 
What kind of olives should you use? Well, that's a matter of personal preference. I do recommend using a mix of a couple different kinds of olives if you're not using capers. Buy them pitted, since, well, this is the Slacker Gourmet. You don't necessarily have to get them from the fancy olive bar in nice supermarkets; there are many perfectly nice jarred olives out there. The only guideline I personally have is: if it comes in a can, it's really not appropriate for tapenade.

A little more explanation on the puréeing technique: typically a food processor is the easiest tool for the job. But - this recipe only makes a cup or so of tapenade, so if you have a 14-cup food processor and can't find your little mini processor, it's definitely not worth getting the big processor dirty if you have a stick blender.

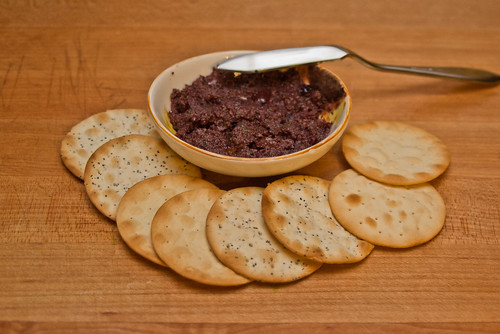
Homemade olive tapenade (Project 365: 87/365) 

Easy Olive Tapenade
Makes 1 - 1 1/2 cups

Ingredients
  • 1 1/2 cups pitted olives, rinsed (this is important!) and divided (any kind, or a mix - see notes above) 
  • 2 tablespoons capers (optional - use a mix of olives if not using)
  • 1 whole clove garlic 
  • 1/2 - 1 tablespoon fresh parsley, basil, or oregano (optional)
  • 1/2 - 1 tablespoon lemon juice or red wine vinegar 
  • 2 tablespoons olive oil
  • Fresh cracked black pepper

Directions

Food Processor:
Combine 1 cup olives, capers (if using), garlic, herbs (if using), and 1/2 tablespoon lemon juice or red wine vinegar in the food processor bowl. Pulse until all components are between chunky and finely chopped. Drizzle olive oil in while processing until the mixture comes together and looks almost like a paste. Add the reserved 1/2 cup of olives and pulse until the new addition is coarsely chopped - this will add some extra texture. Taste and add the additional 1/2 tablespoon of lemon juice/vinegar if necessary, and stir in pepper to taste.

Stick Blender:
In the smoothie cup that comes with your stick blender, or a medium bowl, combine 1 cup olives, capers (if using), garlic, herbs (if using), and 1/2 tablespoon lemon juice or red wine vinegar. Hit it with the stick until the texture is between chunky and finely chopped. Add the olive oil all at once, and hit it with the stick again, until the mixture looks like a rough paste. Add the reserved 1/2 cup of olives and give it another hit with the stick until those olives are coarsely chopped and the tapenade looks like it has a variety of textures. Taste and add the additional 1/2 tablespoon of lemon juice/vinegar if necessary, and stir in pepper to taste.


Okay, now you have tapenade, and it should keep for at least a week in the fridge. Now, what can you do with it?
  • Use it as a relish for grilled chicken or fish. 
  • Slather it on raw chicken or fish, wrap in parchment paper or foil, and bake for 15 minutes (thin cuts of fish), 20-25 minutes (thicker cuts of fish), 30-40 minutes (chicken) at 350 degrees.
  • Use as a delicious sandwich spread (especially on a Mediterranean-inspired sandwich)
  • Spread it on baguette slices or crackers for an elegant appetizer. If you want to jazz up the spreading platform, brush baguette slices with garlic olive oil and toast in the oven or toaster oven until golden brown.
  • Toss it with cooked pasta and top with a sprinkle of Parmigiano-Reggiano for a quick meal or side dish.
  • My mother, a dyed-in-the-wool New Yorker, once suggested using tapenade as a non-dairy/non-fish spread alternative to cream cheese and lox - and let me tell you, it's darn tasty! You get that nice saltiness without the fishiness, which is a huge bonus for my smoked-salmon-hating hubby.
Easy, savory, and versatile - the perfect Slacker Gourmet condiment.
Monday, June 18, 2012

Slacker Gourmet Formula: Pasta/Grain Salad

Well, more than a year has passed since my last Slacker Gourmet post. Oops. I could make all sorts of excuses about buying a house, and job changes, and blah blah blah, but instead, I'll just refer you to the "Slacker" portion of the blog title, and just go from there.

As a UI Developer by trade, creating web page templates is a big part of my day-to-day life - a basic structure for a page, filled in with different content, depending on a particular database call. For a large site with hundreds of thousands of pages, templating is completely necessary, otherwise we'd be reinventing the wheel over and over again.

But what does that have to do with cooking? Well, as I postulated in my Fondue Theory post, the creation of a basic formula (or template) for a type of dish makes it easy (and nearly foolproof) to implement nearly infinite variations, limited only by your own imagination. Some basic knowledge of complementary flavors is certainly helpful, but I'll happily make some suggestions to get you started.

My Pasta/Grain Salad formula has been a couple of years in development. Its roots are in Lemony Couscous with Chickpeas, which I've made a shockingly large number of times. However, as a Slacker Gourmet, I crave variety - no matter how easy and tasty something is, I will get sick of it after eating it enough times.

Enter the formula. As long as everything stays in the same basic proportions, there is no reason that nearly every component can't be swapped out for something else in the same basic family (black beans instead of chickpeas - yes; M&Ms instead of olives - not so much). This is where that general idea of complementary flavors will come in handy.

And now... the magic formula!

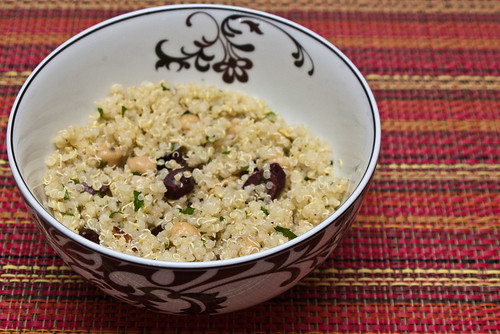
Quinoa salad (Project 365: 86/365)

Pasta/Grain Salad
Serves 4-6 as a main dish, 8-10 as a side dish
Adapted from Lemony Couscous with Chickpeas

Ingredients
  • 1 1/2 cups uncooked pasta/grain
  • Enough water to cook the pasta/grain
  • 1/4 cup citrus juice or other acidic liquid (vinegar is untested; will probably need less)
  • 1 tablespoon citrus zest, if using citrus juice
  • 3 tablespoons high-quality oil (extra-virgin olive oil is probably best in most cases)
  • 1 14oz can of beans, drained and rinsed
  • 1/2 to 1 cup of something briny, like olives, capers, artichoke hearts, rinsed (the stronger the flavor, the less you need)
  • 1/8 to 1/4 cup of something crunchy, like nuts, seeds, wasabi peas, freeze-dried edamame (though the latter two will soften up the longer the salad sits)
  • 1/4 to 1/2 cup chopped herbs and/or scallions
  • Salt and pepper to taste

Directions
Cook pasta/grain according to package directions; let cool. Chop or slice the briny component if it needs it. Whisk together the oil, acidic liquid, and zest (if using). If using nuts, toast in a dry skillet over medium-high heat for 2-3 minutes, moving them constantly with a wooden spoon, until lightly browned and fragrant (as soon as you smell them, get them off the heat). Combine all ingredients in a large bowl. Taste and add salt and pepper, if necessary.


What's so amazing about this salad? Well, it's freakin' delicious. You can make a huge batch and eat it for a week (it keeps wonderfully in the fridge). Depending on the starch component you choose, you don't even need to heat up the kitchen to cook it (see this post for Slacker Gourmet-approved easy starch cooking).

And since it's that time of year, I'd be remiss if I didn't say how great it is for summer potlucks: there's no mayo or dairy to spoil in the heat, and it can easily accommodate special diets and allergies without sacrificing flavor. Gluten allergy? Use gluten-free pasta, rice or quinoa. Vegetarian/vegan? You're already all set as-is! Nut allergy? Leave 'em out - they're not a deal-breaker.

Variations
"Okay, okay, I'm sold!" you say. "But, I need some inspiration for the flavor combos... help me out here!"

Flavor combo Pasta/grain Acidic liquid Oil Beans Briny Crunch Herbs
Mediterranean * Quinoa** Lemons EVOO Chickpeas Kalamata olives Slivered almonds Parsley
Italian Orzo or farro Lemons EVOO Cannellini beans Black olives Pine nuts Basil
Mexican Rice Limes EVOO or canola Black beans Black olives Pumpkin seeds (pepitas) Cilantro and scallions
Moroccan Couscous Oranges EVOO Chickpeas Oil-cured black olives Pistachios Mint
* Pictured above.
** Yes, I know quinoa is technically a seed.


Want to mix it up more? Go ahead and throw some raisins in the Moroccan variation, some feta in the Mediterranean variation, or avocado in the Mexican variation (though it may not keep as long with avocado). Just keep those flavors complementary, and you can't go wrong!
Tuesday, January 25, 2011

Pasta e Ceci

Another day, and more snow in New England. Sure, this time it was only an inch or so, but after yesterday's below-zero lows, I'm not eager to go outside.

Of course, this leads to a catch-22. There isn't much food in the house, so I need to go grocery shopping. But... I can't face the outdoors without something warm and hearty in my belly. So what's a Slacker Gourmet to do? Turn to Google, pull out various cans, jars, boxes and frozen foods, and in less than 1/2 hour, sit down to a filling bowl of comfort food (with enough leftovers for the next couple of days for lunch - bonus!).

Pasta e ceci sounds chic, but it's simply a quick stew comprised of pasta and chickpeas in a tomato base. Everyone seems to have their own recipe - I favored one that I found that treated the liquid base as more of a pasta sauce than a soup. The sprinkling of cheese at the end is purely optional; the sauce is plenty thick without it.

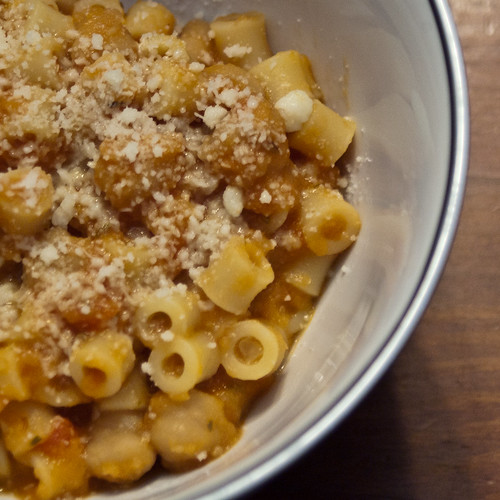
Pasta e ceci


Pasta e CeciServes 4
Based on Pasta e Ceci (Pasta With Chickpeas)

Ingredients

  • Olive oil for sautéing
  • 1 small onion, diced (I used frozen diced onion)
  • 2 cloves garlic, minced (I used minced garlic from a jar)
  • 1 tsp dried crushed rosemary or 1 Tbsp fresh rosemary, minced (I used dried)
  • 1/2 tsp red pepper flakes
  • 1 14oz can diced tomatoes with the juice
  • 1 15oz can chickpeas, drained and divided
  • 1 cup water
  • 1/2 pound small pasta (I used ditalini, elbow macaroni or smaller penne/rigatoni varieties would be good)
  • Salt and pepper to taste
  • Parmesan or Romano for garnish (I used Romano)

Directions
Heat oil in a soup pot. When it shimmers, toss in onion and garlic and sauté until onion is soft. Add rosemary and stir around for another minute. Add tomatoes and their juice, red pepper flakes, and salt (I started with 1/2 tsp here), and simmer until tomatoes soften. Add 1 cup of the chickpeas, reserving the rest for later, and the cup of water, and simmer until heated through. Once the chickpeas are heated, purée the contents of the pot until smooth. Add remaining chickpeas, taste and correct seasoning (I added another sprinkle of salt and some pepper) and keep warm until pasta is cooked.

Meanwhile, boil salted water and cook pasta to al dente - it will suck up the liquid in the sauce and soften further. Drain and toss with the sauce and chickpeas. Serve with a sprinkle of Parmesan or Romano.


Puréeing the tomato-chickpea mixture transformed the humble ingredients into a thick, rich, creamy sauce - without any dairy whatsoever! Next time, I may add an additional can of chickpeas to the finished sauce, as I found myself wanting more of them. Also, I believe the pasta could be simmered directly in the sauce with the addition of extra water - another thing to try next time.
Tuesday, January 18, 2011

Personal Naan Pizzas

Who here loves pizza? *raises hand*

Making your own pizza at home can be time-consuming, especially if you make your own dough and sauce. Even if you use store-bought dough and sauce, you're still committing to making an entire pizza, which, if you're just looking for a quick lunch for yourself, is probably more effort than it's worth.

Enter the English muffin or French bread pizza. Sure, it's tasty, but more in that school-cafeteria kind of way. The crust parts don't even remotely resemble real pizza dough. So, what's the answer?

Naan.

"But that's Indian, not Italian!"

True. But, recipes for homemade naan are not that far off from pizza dough recipes. It's a good thickness, good flavor, good texture and you can find ready-made naan sold frozen in Trader Joe's or Whole Foods. Add tomato sauce and cheese, pop into the oven for a few minutes, and you've got yourself a wholly satisfying personal pizza with minimal effort.

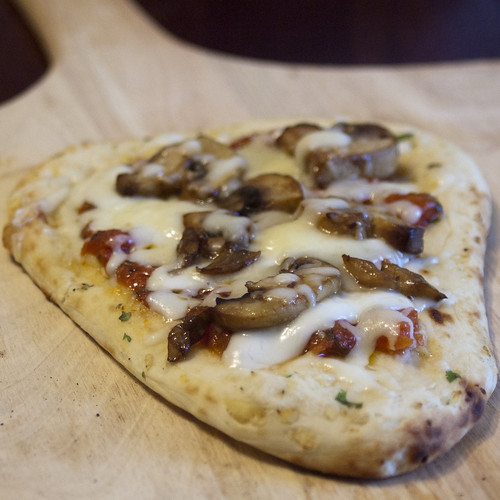
Naan pizza
Personal Naan Pizza
Serves 1

Ingredients
  • 1-2 pieces naan (I like garlic naan, plain is good too), still frozen
  • Olive oil
  • Shredded mozzarella or Italian-blend cheese
  • Jarred or homemade pasta sauce, pizza sauce, bruschetta, etc. (I used Trader Joe's jarred bruschetta)
  • Pizza toppings (optional, I had mushrooms in the fridge so I sautéed and used them)

Directions
Preheat oven to 400°F. Lay out your frozen naan, and brush top lightly with olive oil. Spread a couple spoonfuls of sauce on top, sprinkle on cheese, and add your toppings (if using). Bake on a cookie sheet or directly on a pizza stone for 3 minutes, or until the cheese is melted. If the crust still looks a little pale, move the pizza to under the broiler for about 30 seconds. Cut into quarters, and enjoy (but please, give the cheese a moment or two to cool down slightly - burning the roof of your mouth is not good eats)!
Wednesday, November 10, 2010

Ugly but Delicious: Green Eggs and Rice

When it gets cold out, I want hearty, warm breakfasts to start my day. But now that I'm home all the time, I have to make the warm breakfast for myself, and breakfast sandwiches every day probably aren't the healthiest plan.

A couple of mornings ago, I surveyed the fridge for likely breakfast candidates. Eggs, cheese, green salsa, leftover brown rice... somehow, combining all of those seemed like the right thing to do. And... it was. It looked, quite frankly, hideous in the bowl, but it was so comforting and filling, I didn't care. No pictures for this - I didn't think this would photograph particularly well.

Green Eggs and Rice
Serves 1

Ingredients

  • about a cup of salsa verde (green salsa)
  • 2 eggs
  • about a cup of cooked brown rice
  • a heavy sprinkle (probably small handful) of shredded cheese (I used a Colby/Monterey Jack blend)

Directions

Pour salsa into a smallish non-stick frying pan over medium heat. When salsa begins to bubble, kick the heat down to medium-low, and crack the eggs into the salsa. Cover (or not - I didn't bother) and cook until the egg whites are just barely set, and yolks are still runny (if it looks just a touch underdone in the pan, it'll be done in the bowl).

Meanwhile, while the eggs are cooking, heat up the rice, and dump into a bowl. When the eggs are done, glop the whole mess on top of the rice, top with shredded cheese, and mix well.


YUM.The egg yolk, cheese, and salsa mix together into a wonderfully creamy and tasty sauce for the rice... it's like a breakfast stew. It may be ugly, but it's good, decently healthy, and filling, and sometimes, that's all you need.
Saturday, October 2, 2010

Mexican Poached Eggs

Who here likes making big full dinners after work?

Don't all raise your hands at once.

Well, for the 100% of us who don't want to spend the entire night dealing with dinner, here's a dish that is practically the embodiment of the Slacker Gourmet philosophy.
  • It's quick - about 15 minutes from start to finish.
  • It's easy - if you can open a can, open a jar, and crack an egg, you have the necessary skills to make this.
  • It's versatile - it works equally well for breakfast, lunch, or dinner.
  • It's cheap. Like, really cheap. You probably have 3 out of the 4 ingredients on hand already.
  • It's really satisfying. It may not look too pretty, but after a full day at work, it's the perfect warm, tasty, and healthy meal.
This is very loosely inspired by the Italian dish Eggs in Purgatory, which was one of those eye-opening epiphany recipes for me - namely, "Hey, I can poach eggs in flavorful liquids, not just water!"

IMGP4864
Mexican Poached Eggs
Serves 2

Ingredients
  • 1 14.5oz can black beans, drained and rinsed
  • 1 1/2-2 cups salsa (I used salsa verde)
  • 4 eggs
  • Queso fresco, crumbled

Directions
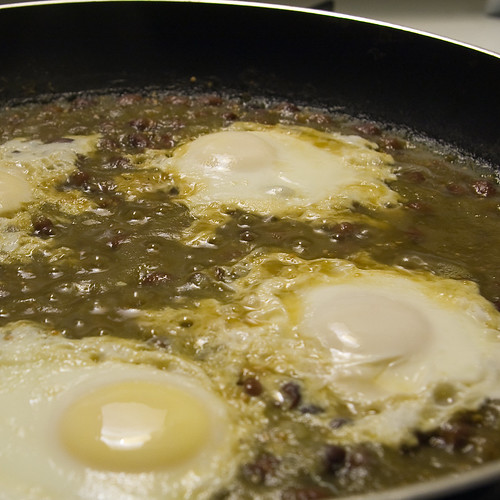
Combine beans and salsa in a large skillet over medium heat and simmer for 3-5 minutes. Break the eggs into the bubbling mixture, spacing them evenly in the pan. Cover and let simmer for about 5-6 minutes, or until whites are barely set (on my stove, this results in firm but slightly creamy yolks). Scoop beans, salsa, and 2 eggs into each bowl and top with queso fresco.


Like I said before, this is not a pretty dish in the slightest. There's really no good way to present it, and I find it's ultimately the most satisfying when everything is just glopped together in a bowl. I definitely recommend queso fresco as the cheese topping, as opposed to something melty like shredded monterey jack - both for flavor and texture.
Wednesday, April 21, 2010

Edamame-Shiitake Salad

One of the hardest parts of being a Slacker Gourmet is finding easy-yet-satisfying side dishes to go with simple main courses, such as grilled chicken. Sure, I always have frozen veggies on hand, but those can be so bland. Also, as the weather gets warmer, the desire for cool side dishes grows. So, I give unto you, faithful reader, a 3-ingredient (okay, 4 if you count oil for sautéing) side dish that's light, refreshing, and oh-so-healthy!


Edamame-Shiitake Salad

Ingredients
  • 12oz frozen shelled edamame
  • 1 package fresh shiitake mushrooms, sliced
  • Olive oil
  • 1-2 Tbsp bottled Asian-style salad dressing (I used Trader Joe's Sesame Soy Ginger Vinaigrette)
Directions
Heat some olive oil in a non-stick pan, and sauté the sliced shiitakes. Let cool. Put frozen edamame in a microwave-safe bowl and add about 1/4 cup water. Microwave on high for 4-5 minutes. Drain edamame in a colander, and rinse with cold water to cool down quickly. Make sure the edamame drains well - pat it dry with a paper towel if it's still too wet. Combine the now-cooled mushrooms and edamame in a bowl, and mix in just enough salad dressing to just barely coat the veggies. Cover and chill until cold.
Sunday, April 11, 2010

Sesame Spinach Salad

Frozen spinach. It's a true powerhouse in the Slacker Gourmet's arsenal. Easily thawed for inclusion in casseroles or dips or thrown straight from the bag into a frying pan for sautéing (though that's another post), frozen spinach can be used in countless ways.

Until today, I had never thought to use frozen spinach in a cold salad application. In retrospect, it makes perfect sense - why buy and clean fresh spinach, just to clean it, boil it, and cool it down, when you could simply thaw and drain frozen spinach? I prefer the spinach in a bag, rather than the frozen bricks - it's much more manageable and thaws more evenly. I almost always have a couple of bags each of cut leaf and chopped spinach on hand.


Sesame Spinach Salad
Adapted from Sesame Spinach Salad

Ingredients
  • 16oz frozen cut-leaf spinach, thawed but not warm
  • 2 Tbsp sake or dry white wine
  • 1 Tbsp soy sauce
  • 1 tsp sugar
  • 1 tsp sesame oil
  • toasted sesame seeds, for garnish.
Directions
Squeeze cold spinach in a tea towel or in multiple layers of paper towels, removing as much water as possible. Whisk together the sake, soy sauce, sugar and sesame oil in a medium bowl. Add the spinach and toss to coat with the dressing. Sprinkle with toasted sesame seeds.

TO TOAST SESAME SEEDS:
Preheat a small skillet over high heat. When the skillet is hot, add sesame seeds. Keep them constantly moving (either by swirling the pan or stirring with a wooden spoon). Sesame seeds toast quickly - about 1 minute for black sesame seeds, and between 1-2 minutes for white. They are done when you just start smelling a nutty sesame aroma. Black sesame seeds will turn shiny, and white ones will turn golden.


This turned out to be a good base recipe. I used a sweeter wine (it's what I had on hand) and less sugar - next time, I would definitely use sake and the full amount of sugar. I really like the sesame flavor with the spinach, so next time, I may even increase the amount of sesame oil slightly. For a quick salad requiring no fresh produce, however, this was pretty great!
Monday, March 29, 2010

Mediterranean Eggplant Sandwich

Lunchtime ennui. It's an affliction that strikes millions of Americans every afternoon. It's especially hard to avoid it as a Slacker Gourmet.

Leftovers? Maybe sometimes, but most of the time, it's just not that appealing the next day. Turkey sandwich? How... original. More often than not, I find myself contemplating the mediocre offerings of the office cafeteria and wondering why I'm spending $7 on another unsatisfying lunch.

How can you fight lunchtime ennui? By making an easy, café-worthy sandwich that's filling, satisfying, and oh-so-tasty.


Mediterranean Eggplant Sandwich

Ingredients
  • 1 focaccia roll
  • 2 large and 2 small frozen breaded eggplant cutlets
  • 3-4 sliced rounds of fresh mozzarella
  • jarred roasted or pickled red peppers
  • 1-2 Tbsp hummus
Directions
Place eggplant cutlets in a toaster oven heated to 425°F for 15 minutes, or until golden brown and cooked through. Slice focaccia roll open and spread hummus on the top half of the roll. Assemble the sandwich by arranging the eggplant slices on the bottom half of roll, adding the mozzarella rounds and red peppers, and topping off with the top half of the roll.


Okay, so a sandwich with breaded eggplant cutlets doesn't seem very Slacker Gourmet, but when they come pre-breaded and frozen from Trader Joe's... that's a whole different ball game. Most of the prep time (the heating time for the eggplant) can be done while you're getting ready for work. Roasted red peppers can be found in the Italian section of the supermarket - I used Pastene garlic red peppers. Tangy and delicious!