
My name is Val, and I love bacon. (Hi Val!)
However, I don't love cooking bacon. Standing over the stove, with my vision slowly being obscured by the thin film of bacon grease covering my glasses... I'm not interested. Sure, it's great to have a batch of bacon grease at the end to save for another application, but I never actually end up saving it (mostly because I'd find an excuse to fry EVERYTHING in the leftover grease, and I enjoy keeping my heart beating regularly).
I don't mind bacon that's been cooked in the microwave, but it requires some annoying cleanup as well. Purpose-made plates with ridges and channels to let the bacon drain as it cooks are a pain to wash, and the microwave ends up covered in grease splatters.
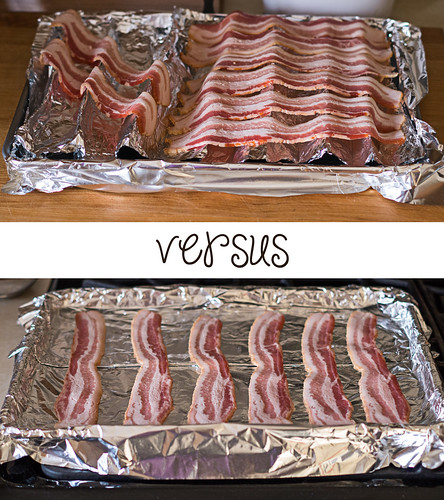
Links have been circulating on Facebook and Pinterest claiming that you can cook bacon in the oven. There are a few methods out there - on top of a cooling rack, directly on a foil-lined baking sheet, and by making a "rack" out of foil. I immediately discounted the cooling rack method, having had multiple bad experiences with trying to wash little meaty bits out of the grid (and the last cooling rack I tried to wash in the dishwasher got completely rusted over, so I'm not eager to ruin another one).
So that leaves the 2 foil-based methods for easy cleanup. Whenever I roast veggies or make tater tots, I line a baking sheet with foil so that I don't have to wash it afterwards. The idea of applying that same principle to bacon-making was very appealing.
I suspected that the rack made from the foil "accordion" would be more effective for crisping the bacon by allowing for more airflow and draining the grease. Conversely, I figured that the bacon cooked directly on the pan would be soggier and greasier from sitting in its own fat without draining.
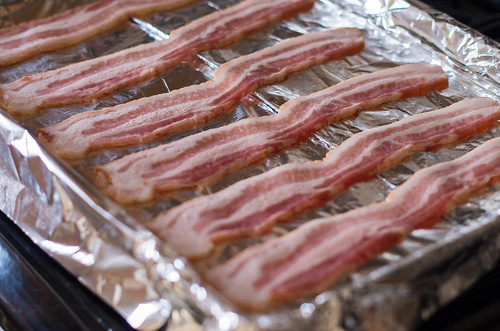
Both methods began with lining the baking sheet with foil. If your aluminum foil isn't wide enough to fold over the sides of the pan (to prevent the bacon grease from getting on the pan), crimp 2 pieces together in the middle by lying one piece on top of the other, and folding the long sides over each other 2-3 times. When the pieces are secured together, spread them out - you should have a double-wide piece of foil to line your pan and fold easily over all sides.
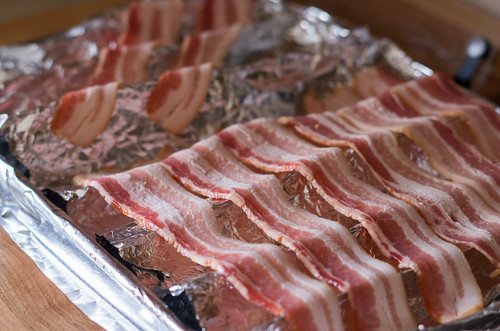
For the foil "accordion" rack, simply fold a piece of heavy-duty foil that's about twice as long as the pan back and forth like an accordion, and spread it out to fit in the pan. The bacon is then laid out over the "rack". Don't have heavy-duty foil? Stack 2 pieces of regular foil and fold as if it was one piece.
Both batches of bacon were started in a cold oven, set to 400°F. Since I used a thicker-cut bacon (not super-thick, but thicker than typical bacon), I left them in the oven for 30 minutes total, but began checking on them every few minutes at the 18 minute mark. After removing from the oven, I drained and blotted both batches with paper towels.
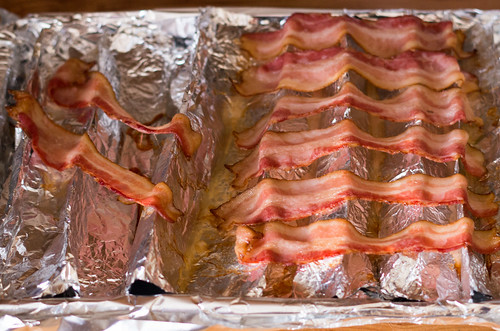
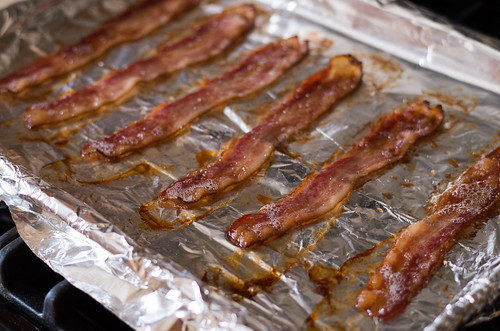
I was surprised by the end results. The bacon cooked directly on the pan ended up cooking more evenly, and was less greasy after blotting. The bacon cooked on the "accordion" rack didn't drain nearly as well as I had theorized. The bottom of the bacon strips didn't cook nearly as well as the top because they weren't in contact with a hot pan. They ended up greasy and slightly flabby, even after blotting. Don't get me wrong - I still ate plenty of bacon from both batches. But, it's not worth using extra foil and an extra couple of minutes to fashion a makeshift "rack", and that makes this Slacker Gourmet very happy.
Oven-Cooked Bacon
Serves 1 - 4 people
Adapted from many, many people on the internet
Ingredients
- 1 lb bacon
Directions
Line a baking sheet with foil, making sure to fold the foil over the sides to prevent bacon grease leaks. If your aluminum foil isn't wide enough, make a double-wide piece of foil by crimping 2 pieces together in the middle.
Lay the bacon out evenly across the baking sheet - try not to have them touch. Put the baking sheet in a cold oven and set it to 400°F. For thinner pieces of bacon, begin checking for doneness at the 17 minute mark. For thicker-cut bacon, begin checking for doneness at 20 minutes.
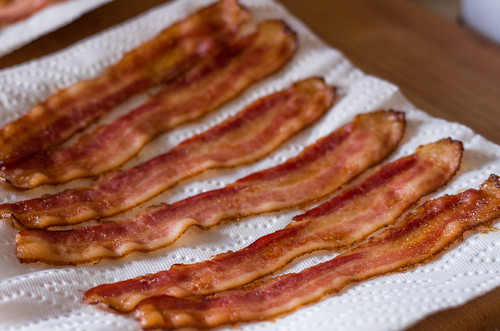
When the bacon is browned around the edges and at your preferred doneness level, remove the baking sheet from the oven. Using tongs if the bacon is too hot to handle, transfer the bacon strips to a paper towel-lined plate, and blot the top of the bacon with another layer of paper towels.
If you want to save the bacon grease, carefully pick up the foil lining and drain the grease into a container. If you just want to dispose of it, you can do one of two things: layer some paper towels on the foil to soak up most of the bacon grease, then carefully fold up the foil for disposal; or wait until the grease cools and solidifies and fold up the foil at that point. Hopefully, you shouldn't need to wash the pan!
Print this recipe!
Print this recipe!


