Showing posts with label dinner. Show all posts
Tuesday, April 29, 2014

80% Pizza

And now for something that's the complete opposite of dairy- and gluten-free... here's a guest post from my husband, Kevin! For as long as I've known him, he's been striving to make amazing pizzas at home. Luckily, it's surprisingly easy to make a darned good pizza at home without any pizza-specific equipment, and with just a few easily-obtained ingredients. Following this method, even I was able to make a pizza that was far and away better than the vast majority of our local take-out joints  - so if I can do it, you can too. 

Take it away, Kev!

Pizza!

Great pizza is great, and bad pizza is, well...it's still pretty darn good! Sounds like a good candidate to make at home, doesn't it?

Hi there. I'm Kevin. I like to think that Val's the gourmet, and I'm the slacker. So why am I here? Well -- I'm no chef, but when it comes to pizza, I've got some strong opinions.

Here's one - making pizza at home is: cheap, tasty, easy. Choose three. No, really. You don't have to compromise.

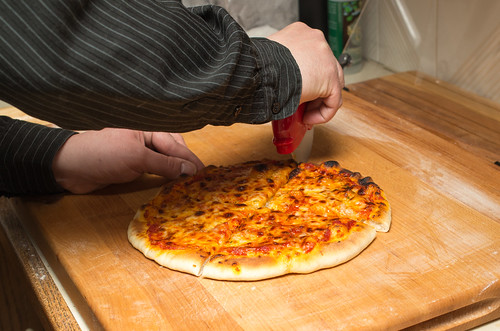
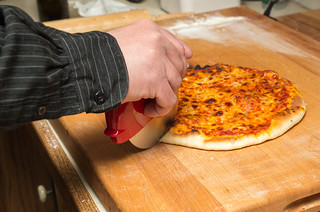
Cutting the pizza

Well, I should qualify that. Do you care about making 18" pies so you can get NY-size slices? Do you require your pizza to be wood-fired in a 1000 degree oven? Have you invested in a Hobart floor-standing mixer because your KitchenAid couldn't develop gluten effectively enough in big dough batches? No? Then don't worry about it. You are going to love the 80% pie.

This is the product of another opinion of mine - that in the food world, pizza is the purest embodiment of unattainable perfection. No matter how hard you work at it, it's always, always possible to make a better pizza. (Sure, plenty about pizza is subjective, but stick with me here ok?) So think about a pizza that is 99% as good as can possibly be made. We're talking the stuff of legend. The stuff you have to drive across state lines to find...or maybe even hop on a plane. This is the stuff you get from pizzaioli who have devoted their lives to it. That's the level of commitment required. That's a 99% pie.

An 80% pie, on the other hand, requires you to read a blog post written by a dork, buy three ingredients, and spend 30 minutes in the kitchen. You'll get it on the first try.

In the oven

Don't believe me? I've formed these opinions based on over a decade of trial and error (and error and error). And then I threw out most of what I came up with because I read stuff by folks like Kenji over at Serious Eats. It blew my mind.

The methodology in this post is adapted from one of Kenji's methods. Really, he did all the hard work. All I'm going to do is recommend where to cut corners. The beauty of this method is that it yields great, consistent results -- and it does it without special equipment.

Hardware

You just need a broiler and a 12" oven-safe skillet. Cast iron, enameled cast iron, or steel are all great. Just don't use non-stick whatever you do, it can't take the heat!

A bench scraper and pizza cutter are also handy, though not required.

Ingredients

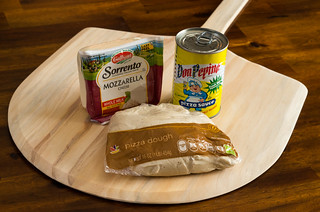
Ingredients


Pizza is a blank slate. Topping combinations are limitless. That's a worthwhile rabbit hole to go down, but it's one for another day. First, we need to cover fundamentals. Let's make the slate tasty!
  • 1 can Don Pepino pizza sauce
  • 1 lb Sorrento whole milk dry mozzarella block
  • 1 lb Stop and Shop pizza dough (typically found near the deli, don't get the one from the bakery)
Note: this will yield two 10" pizzas, with leftover sauce and cheese.

That's it. Only other thing you need is a little flour and some olive oil.

Do the ingredients matter? Yes. I chose these specific brands because I've gotten the best results from them out of all widely-available options I've tried. Jump down to the appendix if you want explanations and alternatives.


Dough Prep

Take your dough out of the fridge and let it warm up to around room temp on the counter. You might need to do this 15 to 30 minutes before starting. Don't skip this step -- it's important because it makes the dough easier to shape and helps to get a good rise out of it. Once it warms up, let's jump in.

I don't know about you, but dough intimidates me. The darn stuff just seems to have a mind of its own. Well, let's show it who's boss. First things first: we're making 10" pizzas, and a pound of dough is perfect for two of 'em, so we'll subdivide it. After that it will have some time to rest and proof (warm up and rise even more) while we prep other ingredients.

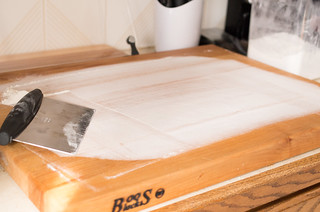
Grab some AP or bread flour and prep a work surface. A bench scraper is great for this.

Floured board

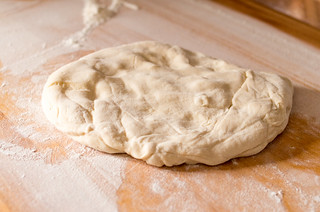
Pretty much all packaged dough is sticky stuff. Put some flour on your hands and turn the plastic packaging inside-out. Let gravity help you peel the dough off the plastic, and onto your floured surface.

Dough

Get a little flour on every sticky surface of the dough. This makes it easier to work with.

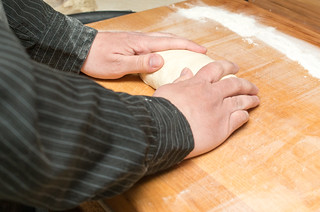
Working the dough

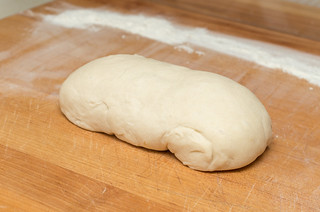
Shape it into a little loaf. Don't knead it (fold it over itself), just press and form it.

Dough log

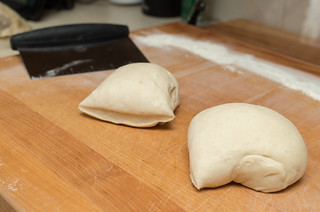
Now it's easy to divide it into two equal pieces. Again, a bench scraper is great for this, or use a knife. It doesn't have to be perfect. Eyeball it!

Note: If you didn't divide it as evenly as you'd like, just go with it. Don't try to rip little pieces off one and stick it to the other one. The dough is typically too far developed to do that successfully, and hilarity will ensue if you attempt it.

Split dough

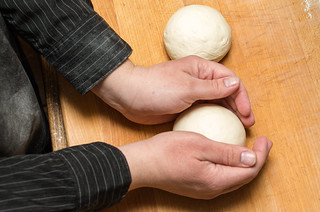
Take a dough in your hand with the cut side down. Shape it into a ball by pushing it into itself from the bottom-up, like it's a little jellyfish. Repeat with the second one.

Dough ball

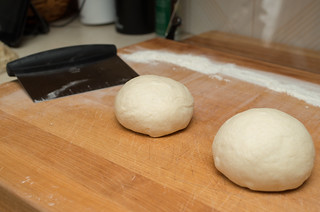
Put the dough on your work surface, seam side down. Keep it touching the surface and rotate it a few turns between your hands. This makes the dough taut and smooth.

Dough ball

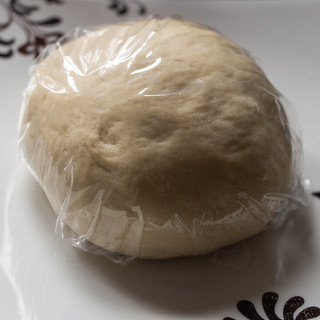
Good to go! Cover these in a little plastic wrap and let them sit and proof.

Proofing the dough


Note 1: Hey if this was confusing, refer to someone far more skilled than I at teaching -- the great Mr. Alton Brown. He has an excellent video demo of dough handling in his first pizza episode of Good Eats: Flat is Beautiful.

Note 2: If you want to save one of these for later, seal it up in a zip-top plastic bag (quart or larger), with as much plastic touching the dough as possible. This prevents it from forming a skin.

Mise En Place

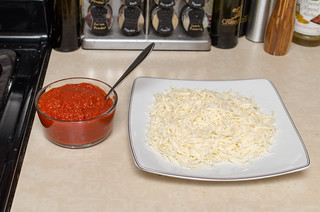
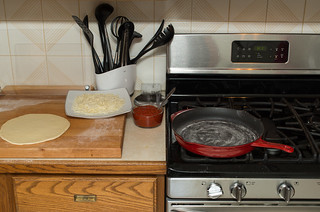
Sauce and cheese

Pop open your sauce can and get a large spoon at the ready, then shred some cheese. Each 10" pizza only needs a few ounces, so you don't have to shred that whole huge block. Unless you wanna.

Remember, you are the Royal Taster. Always be sure to taste your cheese to ensure it's safe for general consumption. Might want to repeat that a few times to be especially safe.

Pre-heat

Ready to go? We're going to use the broiler.

Arrange your rack so you can just barely fit your skillet on there under the broiler. I haven't tried this with a bottom-drawer broiler, but I expect that it would work fine. Turn the broiler on as high as it goes and let it pre-heat.

Form the Dough

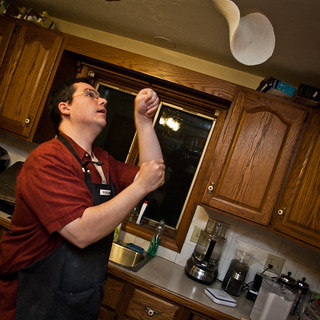
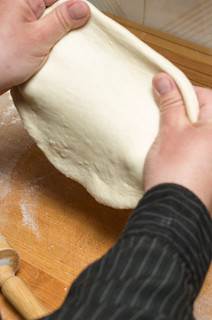
Now for the fun part! Let's shape that dough ball into a disc. Are you ready to toss that sucker in the air?

Make-a-da-pizza (Project 365: 80/365)

Just kidding. Yup, it's really fun to toss it like this, but frankly it doesn't work great with the small 10" pizzas we're making today, and it's a bit error-prone. Also, don't do this in a kitchen with a ceiling fan going.

Nope, this article is about consistent and easy results. Know how we get that? A rolling pin.

Pizza nuts typically scoff at the thought, and yup, it's true that you won't reach perfection this way -- but you will get an awesome pie, and you'll do it on your first try. Hand-stretching takes hours of practice. After years of doing it I still tear the center of my dough sometimes.


Maybe I just suck. But no matter! With a rolling pin, it's smooth sailing.

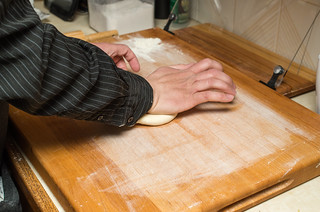
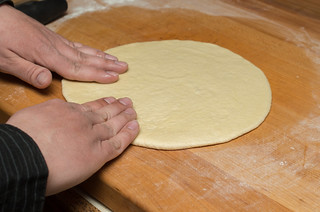
First, lightly re-flour your surface and drop a dough ball on it. Use the palm of your hand to flatten the ball into a disc.

Forming the dough

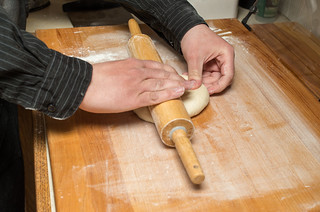
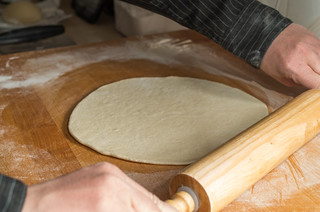
Now start rolling. It'll take a bit of time and patience. Don't rush, you'll get the hang of it.

Forming the dough

Stretch it gently with your hands a bit as you go, then roll some more.

Stretching the dough

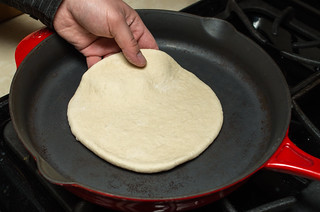
As you progress, put it in the 12" skillet as a point of reference. We're aiming for a 10" dough -- actually, just a little bigger.

Sizing the dough

If it takes an eternity your dough might just need to warm up a bit more. You can always cover it in plastic and come back after 5 or 10 minutes and try some more. Temperature makes a huge difference in how much your dough cooperates.

Rolling the dough

This method won't give you much of a crust, but it will give you the uniform thickness you need.

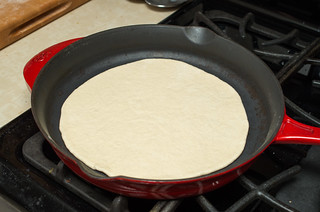
Sizing the dough

There we go. That's the size you want, a little smaller than the skillet. Return your dough to the work surface.


Top and Cook

Here we go, the point of no return.

You're going to pre-heat the skillet on the stove top, put the dough in it, top it, then put it in the oven.

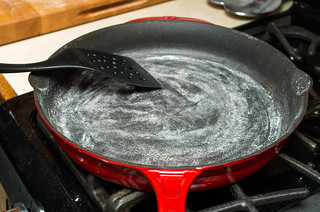
First, dust the skillet with some flour, and shake off excess. Spread it evenly.

Flouring the pan

Preheat the skillet under high heat. Our aim is to get it to the point just before it starts smoking.

Meanwhile, on your work surface, drizzle some quality olive oil on your dough and rub to coat. Blot off any excess. Note that this will shrink your dough slightly. That's OK.

Oiling the dough

Look sharp, keep an eye on that pan as it heats. It should take around three minutes. Now's the time to have your sauce and cheese at the ready.

Ready to go

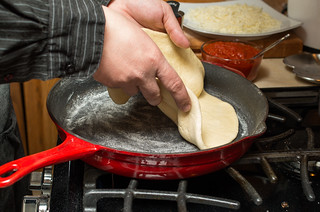
Once you smell the flour start to get fragrant, before it starts smoking. it's time to add the dough to the pan. Safety is more important than perfection here, don't burn yourself! I like to lay one edge of the dough near the edge of the pan, then lay the rest down.

Placing the dough

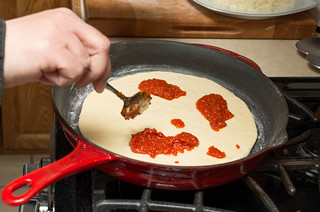
If your dough ended-up bunched or something in the pan, use a spatula to adjust it. Don't worry if it's a bit oblong -- we need to keep moving now. Spoon on some sauce.

Saucing

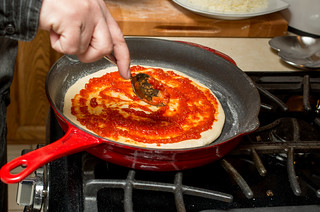
Spread the sauce with your spoon and get good coverage, but don't drown the thing.

Saucing

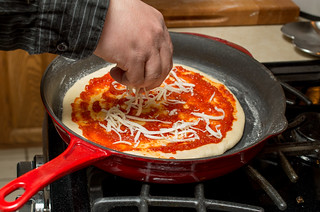
Cheese it!

Adding cheese

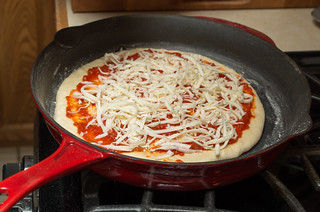
You may be tempted to bury it in a sea of white. Resist this urge. The best pizza has balance.

Ready to bake

Feel free to sprinkle with a bit of kosher salt if you want to kick things up a bit. Also some dried oregano or parsley is nice to add some color.

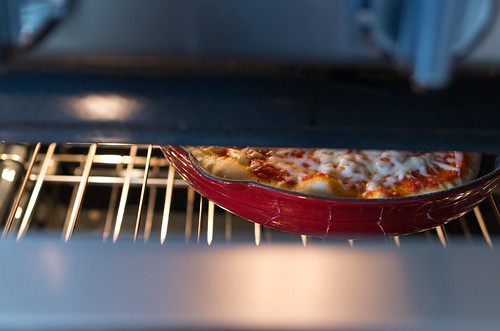
Turn your stove-top burner off, then under the broiler it goes!

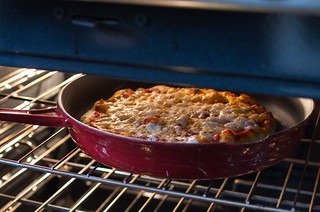
In the oven

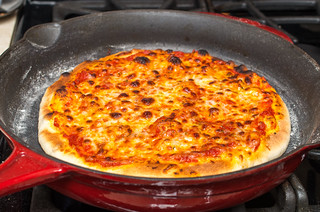
Now to get this baby golden and delicious. Look for your cheese and dough to brown up. It'll take anywhere from 1.5 to 4 minutes, depending on your broiler. You may need to rotate your pan halfway through to get even browning. Watch it, then pull it when it looks maximally awesome.

Almost done

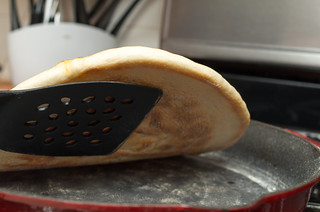
The top is done, but the bottom isn't yet. Put it back on a burner and turn it up to high.

Crust check

Almost.

Crust check

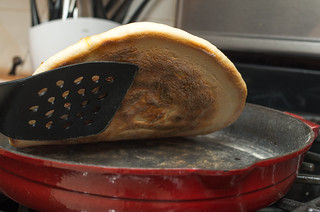
Almost!

Browned crust!

There we are.

Well done! Kill the heat, and use a spatula to carefully transfer the pizza to a cutting board. Let it sit for a minute, then if you have a pizza cutter go to town. Else any cutting implement can be used. My grandma was all about kitchen shears.


Cutting the pizza

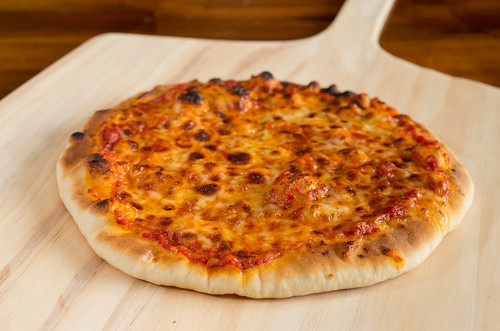
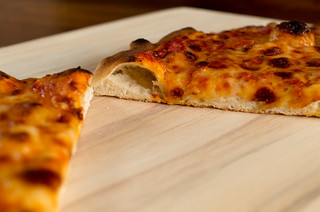
Here, my first attempt had crust that was a bit dense. That's because I didn't let the dough warm up and proof long enough. No matter, it was still delicious!

Cornicione

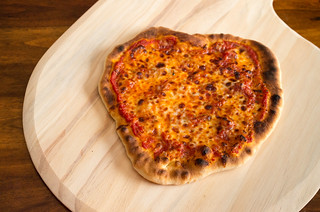
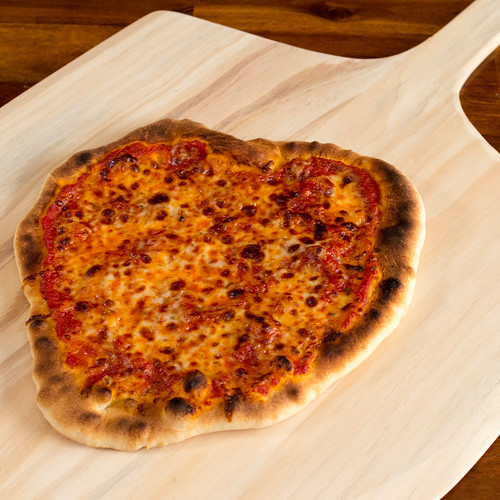
Making a second one? Dive right back in. Here, Val did our second attempt. The dough was much warmer, which made it tougher to keep round. It also yielded a better crust, though! (The blobby heart shape was... totally intentional. *shifty eyes* - Val)

Blobby pizza

Nom!

Dig in!!

I <3 pizza (Project 365: 60/365)


APPENDIX

When it comes to slacker pizza making like this, I found the hardest part to be picking which ingredients to source. Here's what works best for me, and some alternatives for convenience.


Sauce

This is a matter of personal opinion, but I strongly recommend you pick up:
  • Don Pepino pizza sauce
    • Fresh, uncooked, delicious sauce, light on herbs.
    • Lots of super markets have it -- I've seen it in at Hannaford's, Price Chopper, and Wegmans. My Stop and Shop doesn't have it unfortunately, but yours may. I can't remember if Whole Foods has it.
There's a really big difference between starting with an uncooked vs. cooked pizza sauce. It's certainly a matter of opinion, but I've found that I strongly prefer uncooked.

There are a million brands you could use...why Don Pepino? First, because it doesn't have calcium chloride. Most brands add this to keep tomatoes from becoming mushy, and in my experience it affects flavor big time. Lots of forums discuss this issue. Second, because the quality is excellent. It tastes like fresh garden tomato, year-round. I have no idea how they do it.

Alternative cooked sauce:
  • Stop and Shop Nature's Promise Organic pizza sauce
    • Surprisingly tasty, heavy on herbs.
    • Better than all of the other pre-made cooked stuff in my book (but not as good as Don Pepino).
I feel like cooked sauce doesn't have enough bright, acidic bite to properly stand up to fatty cheese.


Cheese

I'm lazy, but there's one bit of manual labor I don't skip for pizzas: shred your own cheese! Why? Because pre-shredded has anti-clumping agents added. That means it doesn't melt and gooify as effectively.

We'll talk dry mozzarella today. Go full fat whole milk. If you want less calories, use less cheese.
  • Polly-O
    • Having visions of 7th-grade lunch? We're not talking string cheese here. Polly-O whole milk dry mozz blocks are actually world-class stuff. A lot of big name pizzerias swear by it.
    • A little hard to find. I can only get it at Price Chopper at the moment.
  • Sorrento
    • Ubiquitous and excellent stuff.
  • Trader Joe's
    • Also excellent. A little on the saltier side.
If you must use pre-shredded, that's OK. I won't tell.


Dough

The tastiest dough is one you make yourself, but most good ones require an overnight cold ferment. And all of 'em require you to make a mess in your kitchen. This goes against the spirit of this particular pizza post.

Instead, let's buy one. Pick a dough that's cold but completely thawed. We don't want to wait so avoid frozen, and also avoid dough that's so puffed-up it looks like it's about to burst out of the bag.

Options that tend to be consistently good:
  • Whole Foods
    • This is my favorite store-bought dough. It has a great flavor and is easy to work.
    • So why didn't I make it my default recommendation? Because the Stop and Shop stuff is much more ubiquitous.
  • Stop and Shop
    • S&S makes a decent dough. Not the best color and rise, but good flavor.
    • If your Stop and Shop is anything like mine they actually sell three or four different doughs. I use the Stop and Shop branded one that is not from the bakery. The bakery stuff is made on-site, and it's inconsistent. The non-bakery one (usually found near the deli) is made off-site and is completely consistent, no matter which store you buy it at.
    • Heads-up: they store this stuff in freezers in the back, and sometimes all you can find for sale is rock-hard. Avoid those (unless you need a spare sportsball).
  • Bertucci's
    • Just walk up to the take-out counter and ask to buy some dough. You might feel a little weird doing it, but they were always happy to sell me some. They sell large (about 1.3 lb I believe) and small (maybe 3/4 lb?).
    • It ain't cheap, but sometimes they offer you delicious free rolls to go with it! :)
You can certainly ignore these suggestions and try any other dough you like, but be warned -- dough sampling can be frustrating. I often ran into options that weren't tasty, weren't fully-developed (so they would tear), or otherwise caused problems.

If you're new to pizza, try to start with one of these options. Then go nuts and branch out to other stuff!
Saturday, April 5, 2014

Slow-Cooker Chicken Burrito Bowl (gluten-free, dairy-free)

Life has gotten in the way of this Slacker Gourmet these past few weeks. Our oldest cat, Oliver, was diagnosed with lymphoma in March (following over a month of mysterious symptoms and red herrings leading to incorrect diagnoses), and the 3 weeks that followed were filled with vet visits, tube feeding, and absolutely no cooking at home. Unfortunately, chemotherapy was unsuccessful and he had become too weak to fight any longer, so we had to make the devastating decision to put him to sleep on March 30. The house feels so much emptier without his room-filling purrs. :(

But - life goes on, and our other two kitties, Amber and Orville have been getting awfully spoiled this past week. The emotional toll of the past couple of months plus the constant stream the takeout and restaurant food of the past few weeks haven't done good things to our bodies. It was time to ease back into home cooking, and what better way than with a home adaptation of a takeout favorite?

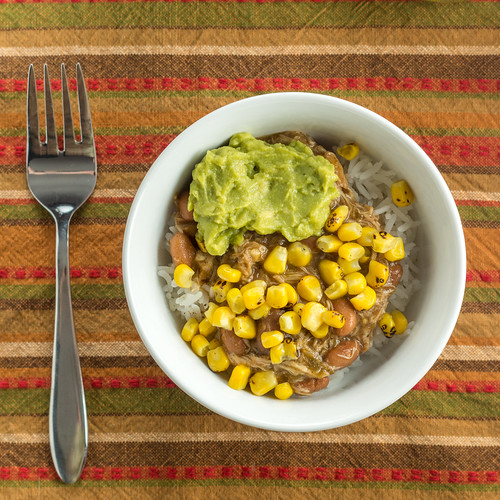
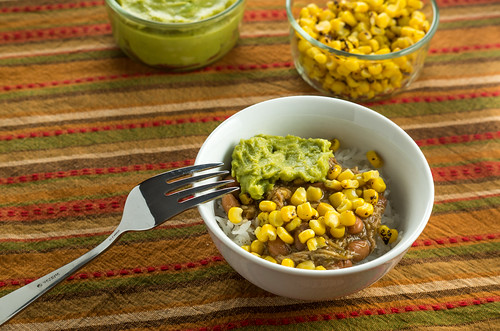
Burrito bowl

One of my favorite fast-food(ish) compromises is a burrito bowl from Chipotle. 85% of the deliciousness of a burrito, with about 50% of the guilt. It's easy to recreate most of the yummyness of the bowl at home with a few simple ingredients (and some Slacker Gourmet shortcuts)! Jarred salsa (I use Goya Salsa Verde, due to the hubby's tomato sensitivity), frozen rice and corn (Trader Joe's frozen roasted corn is amazing, if you can get your hands on it!), prepared guacamole, and boneless chicken thighs make this come together so quickly - 5-10 minutes of prep in the morning, and another 10 minutes at night.
This is not a beautiful dish. If I had used sour cream and shredded cheese and sliced avocado, it could have been prettier... but that's at odds with the dairy-free (and always-lazy) Slacker Gourmet household these days. Of course, you can use whatever toppings you'd like!

The recipe as written makes A LOT of the chicken and bean mixture - but it freezes really well for future use! You can always use it as an actual burrito filling or nacho topping, too.

Burrito bowl (Project 365: 93/365)

Slow-Cooker Chicken Burrito Bowl 
Adapted from Slow-Cooker Chicken and Pinto Bean Burrito Bowl
Serves 6-8

Ingredients
  • 2 lb boneless, skinless chicken thighs
  • 1 16-18oz jar of your favorite salsa
  • 1 Tbsp cumin
  • 1 Tbsp chili powder
  • a healthy squeeze (approximately 1 tsp) agave nectar
  • 1 15oz can pinto beans
  • cooked brown or white rice
  • salt and pepper to taste
  • Any combination of your favorite toppings or add-ins, including:
    • cooked corn
    • guacamole
    • sour cream
    • shredded cheese
    • sliced olives
    • finely diced onions
    • chopped cilantro
    • lime wedges

Directions
Put chicken in a medium (3-4 qt) slow cooker. Mix together salsa, cumin, chili powder and agave nectar and pour over chicken. Cook on low for 6 hours (chicken thighs are pretty forgiving, so you can go longer, but it's better if you have a slow cooker that can switch to "keep warm" mode after 6 hours). 

After 6 hours, shred chicken with 2 forks right in the slow cooker. Drain and rinse the pinto beans and add to the chicken mixture in the slow cooker. Stir to combine, and cover the slow cooker and cook for an additional 1/2 hour on high or 1 hour on low. Taste and season with additional salt and pepper if needed (I usually don't need to add any).

Meanwhile, cook rice, if it's not already made. Season hot rice with a bit of salt and pepper (some lime juice is nice if you happen to have it, but completely optional). 

Make your burrito bowls by spooning a bed of rice into a bowl, and topping with a hearty serving of the chicken and bean mixture. Top with your favorite additions (corn and guacamole are the standard toppings in the Slacker Gourmet household). Enjoy!

Print this recipe!
Tuesday, February 25, 2014

Pumpkin Sausage Sauce

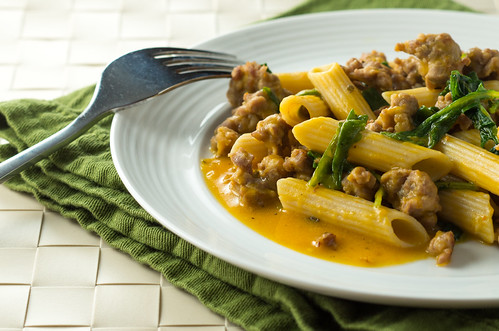
Pumpkin Sausage Sauce (Project 365: 54/365)

Winter, why won't you end? We had a brief reprieve with a sunny, 50 degree day this past Saturday, but now we're back to gusty winds, frosty air, and the promise of more snow. Oh well - spring veggies and grilling time will come soon enough. In the meantime, I have more hearty, cold-weather recipes to share.

A few months ago, I was browsing Instagram. Laura of Mangia Paleo had posted a picture of homemade pumpkin bolognese over spaghetti squash, and I started drooling. However, I looked up the recipe, and one of the ingredients was a jar of marinara sauce. Brilliant idea, adding tomatoes and seasoning all at once, but with a tomato-allergic husband, this recipe was a no-go. But, I just couldn't get the idea of a meaty pumpkin sauce out of my head.

I set out to find another pumpkin bolognese recipe that didn't rely on added tomatoes, and failed. Tomatoes have a unique characteristic that blends together so well with other ingredients, so I didn't want to just leave them out of a recipe without a substitute in place. Suddenly, it came to me - instead of ground beef, why not use sausage meat instead? Letting sausage simmer with other ingredients is a really easy way to infuse great flavor into a sauce.

Turns out I was onto something! There are many recipes for pumpkin sausage sauce out there. But most of them called for the addition of heavy cream at the end to add richness. I liked the idea of a creamy sauce, but since we try to limit our dairy intake, I discovered that full-fat coconut milk could play that part quite easily. The mild coconut flavor melded harmoniously with the subtle pumpkin sweetness.

The flavor profile of the finished sauce will heavily depend on the sausage you choose to use. I typically use sweet Italian sausage, but hot Italian sausage, chorizo, or even a good breakfast sausage would be a delicious change. If you can find bulk (uncased) sausage meat, that will make your life easier - otherwise, you'll have to pull the casings off the sausage. Be sure to use the best quality sausage you find! The recipe wouldn't work quite as well with pre-cooked sausage since you finish cooking the sausage (and infusing the seasoning) in the sauce.

Like many of my recent recipes, this sauce is easily adapted to many different ways of eating. Paleo? It's fabulous served over spaghetti squash (which adds its own sweetness and a welcome crunch). Gluten-free? Either spaghetti squash or gluten-free pasta (which, quite frankly, is more photogenic, so that's how I made it for the pictures). Vegetarian/vegan? Well... I hear that Soyrizo is pretty tasty (I've never tried it), so you could try that in place of the sausage. If you do, let me know how it comes out!

Pumpkin Sausage Sauce

Pumpkin Sausage Sauce
Serves 4-6

Ingredients
  • 1 15oz can pumpkin puree (no spices, just pumpkin!)
  • 1 cup chicken broth OR vegetable broth
  • 1 tsp dried sage
  • a sprinkle of nutmeg
  • a splash of olive oil
  • 1 clove minced garlic (the pre-minced stuff is fine)
  • 1 lb bulk sausage OR 1 lb sausage links, casings removed (any type - breakfast, Italian, chorizo, etc.)
  • a couple of handfuls quick-wilting greens (baby spinach, baby arugula, baby kale, etc.)
  • ½ cup full-fat unsweetened coconut milk OR ½ cup heavy cream
  • salt and pepper to taste
  • a 2-3 lb spaghetti squash OR 12oz dry pasta

Directions
Before starting to make the sauce:
If you're making spaghetti squash, get it prepped and start cooking it using your favorite method. If you're making pasta, start boiling water for the pasta.

Combine pumpkin puree, chicken broth, sage, nutmeg, a pinch of kosher salt, and a grind of black pepper in a decent-sized saucepan (it will eventually hold all of the ingredients). Bring to a simmer over medium heat, stirring occasionally to combine as it heats up.

While the pumpkin mixture is heating, in a nonstick skillet, heat a splash of olive oil and add some minced garlic. Cook for a couple of minutes, till garlic is fragrant but not too brown. Add sausage meat to skillet and break up with spatula, and cook just until no pink remains (but not really brown and crispy).

Using a slotted spoon, add the sausage and garlic to the saucepan with the pumpkin mixture. Bring back to a simmer and let it simmer for 10-15 minutes.

While the sauce is simmering:
If you're making spaghetti squash, scrape out your spaghetti squash strands and set aside. If you're making pasta, cook your pasta according to the package instructions. Drain and set aside.

Add the greens to the sauce, a handful at a time, stirring each handful in until it wilts. Let it simmer for another minute or 2.

Add coconut milk and stir to combine. Taste sauce and add any additional salt and pepper if needed.

Toss with spaghetti squash or pasta. Top with grated parmesan or romano cheese, if desired.

Print this recipe!
Saturday, November 10, 2012

Leftovers: Easy Nachos

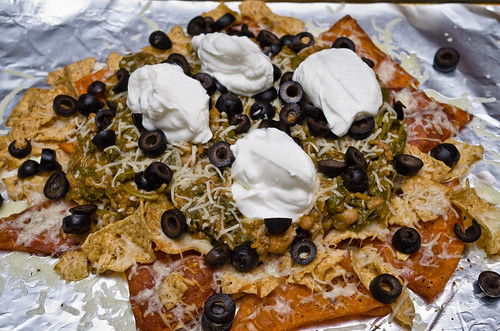
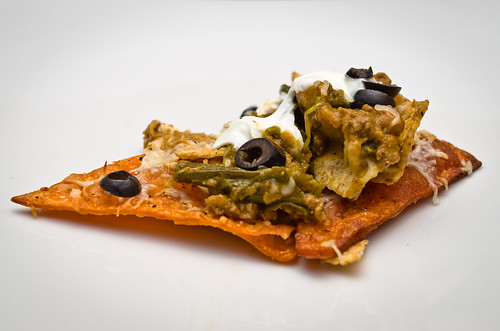
Hurricane nachos

I have a big problem with eating leftovers. If something was really delicious the first time around, I'll eat it a second time. No matter how yummy it was (again), by the 3rd time, I'm usually sick of it. Most of the time I'll try to only make enough for 2 rounds, but not all recipes scale down so well. Therefore, I need to find creative ways to reuse leftovers to avoid wasting food!

The Pumpkin, Turkey, White Beans, and Greens Chili from a couple of weeks ago was one such recipe. I made it on a Thursday, and we ate it for dinner Thursday and Friday nights. Then, Hurricane Sandy arrived with a bang the following Monday, and I figured, "well, the rest of the chili will make a decent meal if we lose power, since we can heat it up on the gas stove." Can't be too picky about leftovers when there's a natural disaster in progress!

By dinnertime, though, we still hadn't lost power (we were lucky and never lost it), and my excitement about chili for the 3rd time was waning. What I really wanted was appetizers - mozzarella sticks, potato skins, nachos - that sort of thing. Hey, wait a minute... nachos?

I looked around the kitchen. We still had shredded cheese and Greek yogurt. We were running low on the Tostitos Scoops, but we had some leftover homemade habenero-lime tortilla chips that friends had brought over for dinner the night before. I found a can of sliced olives in a cabinet. And of course, the leftover chili was waiting to be heated up. Operation Nachos was on!


Hurricane nachos

Easy Nachos
Servings vary depending on whether snack or dinner servings

Ingredients
  • Tortilla chips
  • Shredded cheese
  • Sour cream or Greek yogurt
  • Chili 
  • Other toppings (sliced olives, chopped onions, scallions, salsa, jalapenos, etc.) 
Directions
Preheat oven to 350°F. Line a sheet pan with aluminum foil for easy cleanup. Spread the tortilla chips evenly across the pan and sprinkle liberally with shredded cheese. Bake for about 10 minutes or so, until the cheese is melted (the chips should smell toasty when they're ready to come out).

While nachos are baking, reheat your chili in the microwave or on the stove. When the chips come out of the oven, top with chili and your desired additional toppings. Dollop sour cream or Greek yogurt on top. Serve and enjoy!

Print this recipe!
Friday, October 26, 2012

Slow Cooker: Pumpkin, Turkey, White Beans, and Greens Chili

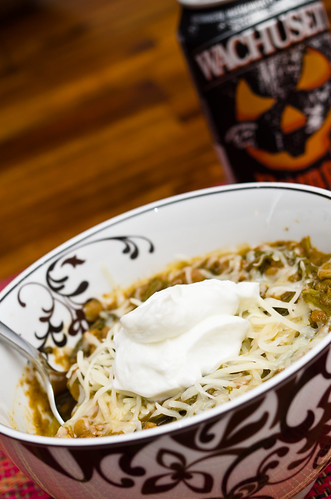
Pumpkin chili and pumpkin beer (Project 365: 224/365)

The hubby's tomato allergy has been somewhat of a challenge to accommodate. Many of our favorite easy meals were tomato-based (which is evident throughout the blog), and there's no easy substitute.

As the weather started getting cooler, my mind turned to chili. But - my standard slow cooker chili recipes call for cans of diced and pureed tomatoes... clearly it was time to think a little differently. White chilis are good, but I wanted something that had that hearty, stick-to-your-ribs feeling like a tomato-based chili. Chilis based on a purée of reconstituted dried chile (with an E!) peppers provided the richness I was looking for, but making the purée was an additional time-consuming step that I simply don't always have the time or inclination to do.

However, a couple of weeks ago, I had made a very successful pumpkin lasagna (which was maybe a bit more involved than a typical Slacker Gourmet recipe, but oh boy was it delicious). While eating the leftovers, I realized that I felt just like I was eating a red-sauce lasagna, but without a tomato in sight. The pumpkin added an earthy slight sweetness, but did NOT taste like a pumpkin pie. I wondered if the same principle would apply to chili. 

I searched around and found this recipe for a pumpkin, turkey and white bean chili. However, based on the comments, I tweaked the amount of meat and spices, and added baby kale (though any leafy greens would be a very welcome addition). The verdict? YUM... and even better the next day! It's not spicy, but it's quite flavorful, and easy to kick up with some hot sauce at the table. And (shhh!), it's actually quite healthy, but you don't really think about that when you're inhaling it.  

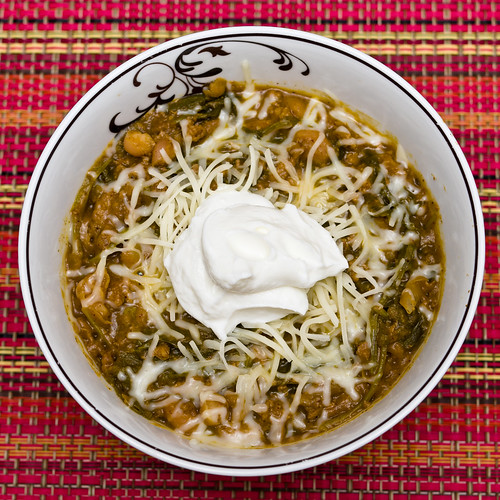
Pumpkin chili

Pumpkin, Turkey, White Beans and Greens Chili
Makes 6+ servings
Adapted from Crock Pot Turkey White Bean Pumpkin Chili

Ingredients
  • 1 1/2 pounds ground turkey
  • 1 small onion, diced
  • 3 cloves garlic, minced (I used the pre-minced fridge stuff)
  • 2 heaping teaspoons chili powder
  • 2 bay leaves
  • 2 heaping teaspoons cumin
  • 1 heaping teaspoon oregano
  • a couple hefty shakes of cinnamon
  • 2 15oz cans small white beans, drained and rinsed
  • 1 15oz can plain pumpkin purée (make sure the ingredients are only pumpkin, no spices!) OR 1 12oz package of frozen pureed winter squash (the kind that comes in a frozen brick)
  • 1 1/2 - 2 cups chicken broth
  • 1 4.5 oz can chopped green chiles 
  • 1/2 pound baby kale or other leafy greens, cut into bite sized pieces
  • olive oil for sautéing
  • salt to taste

Directions
Add all spices, beans, pumpkin purée, chicken broth (use only 1 1/2 cups of broth if using frozen squash - it's more liquid-y to begin with), chiles, and a good pinch of salt to the slow cooker and stir to mix together. 

Heat olive oil in a large skillet. Add ground turkey, onion and garlic to the skillet, along with a pinch of salt, and sauté until turkey is no longer pink and onions are soft, about 5-7 minutes. Add to slow cooker and stir until coated with the pumpkin mixture. Cook on high for 4 hours or low for 8 hours.

About 45 minutes before serving, boost the heat to high (if it isn't there already). Add the baby kale (or other greens) in handfuls, stirring after each addition. They should wilt pretty quickly. Cover and cook for another 20-30 minutes. If the mixture looks watery, uncover and cook for another 15 minutes. If using spinach, you'll probably only need 15-20 minutes of additional cooking to wilt and soften it, but the hardier greens will need the full 45 minutes. 

Taste and correct seasoning (you'll likely need a bit more salt), and serve!

Print this recipe!


When I made this, I cooked the ground turkey separately from the onions and garlic, but with a sufficiently large skillet, I see no reason to keep them separated. My hubby suggested that some sautéed mushrooms would be a welcome addition, and I agree.

As for accompaniments - we ate it with shredded Monterey Jack cheese, Fage 2% plain Greek yogurt, and Tostitos Multigrain Scoops. The plain Greek yogurt made a fabulous stand-in for sour cream (seriously, I think it's even better!).

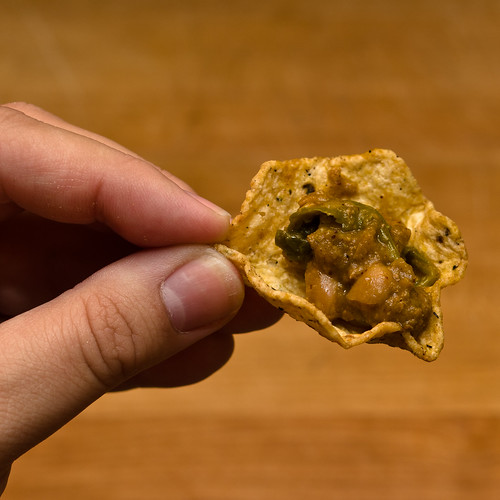
Why Scoops instead of plain tortilla chips? Because they're delicious, and who really needs a spoon when you can do this:

Scooping up some pumpkin chili
Sunday, June 24, 2012

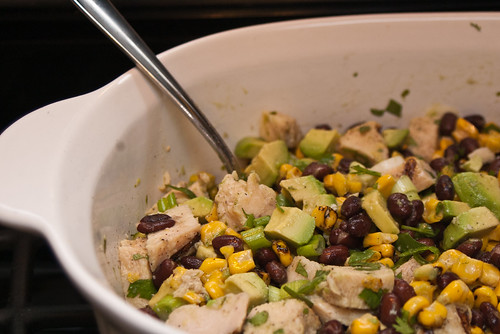
Chicken Avocado Salad, Revisited


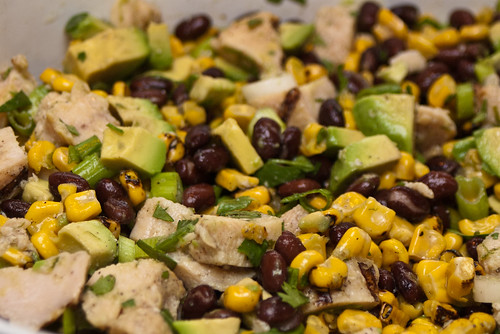
So, once upon a time (read: for the past few summers), the hubby and I both had a love affair with Chicken Avocado Salad. I mean, seriously. It was basically deconstructed guacamole with chicken - what's not to love?

But then... disaster struck. More specifically, the hubby gradually realized that he had developed a tomato allergy. No more chicken avocado salad? Whatever would we do on those hot, sultry nights where we needed a legitimate cover for eating guacamole with a fork?

Summer hit with a vengeance in Massachusetts this week, and as usual, my thoughts turned to the beloved chicken avocado salad. Was it possible to swap the tomatoes out for something equally delicious, but in a completely different way? A quick Google search later, and I had cobbled together a recipe that, quite frankly, beat the pants off the original incarnation. And it took me, my cluttered kitchen and my pathetic knife skills only 30 minutes to put it all together. 


Chicken Avocado Salad: The Tomato-less Version
Makes 3-4 servings
Adapted from Avocado Chicken Salad and Chicken and Avocado Salad

Ingredients
  • 3/4 pound cooked chicken breast, cut into bite-sized pieces *
  • 1/2 pound frozen corn, thawed but not hot **
  • 1 14oz can black beans, drained and rinsed
  • 1 large avocado or 2 small avocados, diced
  • 3 scallions, white and green parts sliced
  • a handful (about 1/4 cup) of cilantro, chopped
  • 2 limes
  • 3 tablespoons olive oil
  • Salt and pepper to taste
Directions
Combine chicken, corn, beans, avocados, scallions and cilantro in a large bowl. Zest (using a microplane if possible - it's much less frustrating than a zester) and juice limes into a small bowl and add the olive oil. Whisk together (or use a fork, it's easier) until it looks like a dressing, and dump it into the big bowl with everything else. Mix it all together with a big spoon. Taste and add salt and pepper, if needed.

* I used Trader Joe's frozen grilled chicken.
** 3 minutes in the microwave on 50% power did it for me. I used Trader Joe's frozen Fire-Roasted corn - highly recommended!


Another beautiful thing about this salad - if you decide you want this taste of summer in, say, November, black beans and frozen corn never go out of season, unlike tomatoes. And sometimes, we all need a little summer in the middle of cold November rain.
Tuesday, January 25, 2011

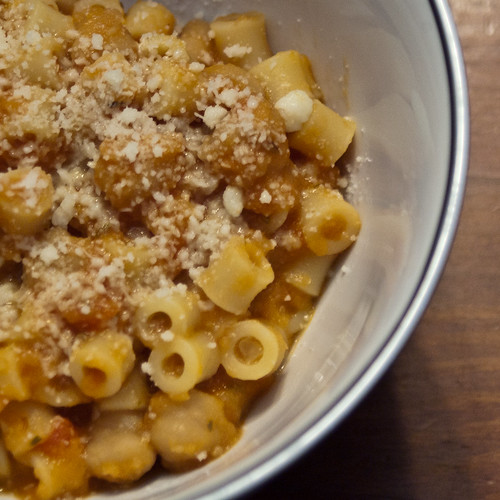
Pasta e Ceci

Another day, and more snow in New England. Sure, this time it was only an inch or so, but after yesterday's below-zero lows, I'm not eager to go outside.

Of course, this leads to a catch-22. There isn't much food in the house, so I need to go grocery shopping. But... I can't face the outdoors without something warm and hearty in my belly. So what's a Slacker Gourmet to do? Turn to Google, pull out various cans, jars, boxes and frozen foods, and in less than 1/2 hour, sit down to a filling bowl of comfort food (with enough leftovers for the next couple of days for lunch - bonus!).

Pasta e ceci sounds chic, but it's simply a quick stew comprised of pasta and chickpeas in a tomato base. Everyone seems to have their own recipe - I favored one that I found that treated the liquid base as more of a pasta sauce than a soup. The sprinkling of cheese at the end is purely optional; the sauce is plenty thick without it.

Pasta e ceci


Pasta e CeciServes 4
Based on Pasta e Ceci (Pasta With Chickpeas)

Ingredients

  • Olive oil for sautéing
  • 1 small onion, diced (I used frozen diced onion)
  • 2 cloves garlic, minced (I used minced garlic from a jar)
  • 1 tsp dried crushed rosemary or 1 Tbsp fresh rosemary, minced (I used dried)
  • 1/2 tsp red pepper flakes
  • 1 14oz can diced tomatoes with the juice
  • 1 15oz can chickpeas, drained and divided
  • 1 cup water
  • 1/2 pound small pasta (I used ditalini, elbow macaroni or smaller penne/rigatoni varieties would be good)
  • Salt and pepper to taste
  • Parmesan or Romano for garnish (I used Romano)

Directions
Heat oil in a soup pot. When it shimmers, toss in onion and garlic and sauté until onion is soft. Add rosemary and stir around for another minute. Add tomatoes and their juice, red pepper flakes, and salt (I started with 1/2 tsp here), and simmer until tomatoes soften. Add 1 cup of the chickpeas, reserving the rest for later, and the cup of water, and simmer until heated through. Once the chickpeas are heated, purée the contents of the pot until smooth. Add remaining chickpeas, taste and correct seasoning (I added another sprinkle of salt and some pepper) and keep warm until pasta is cooked.

Meanwhile, boil salted water and cook pasta to al dente - it will suck up the liquid in the sauce and soften further. Drain and toss with the sauce and chickpeas. Serve with a sprinkle of Parmesan or Romano.


Puréeing the tomato-chickpea mixture transformed the humble ingredients into a thick, rich, creamy sauce - without any dairy whatsoever! Next time, I may add an additional can of chickpeas to the finished sauce, as I found myself wanting more of them. Also, I believe the pasta could be simmered directly in the sauce with the addition of extra water - another thing to try next time.